Like many people running a homelab, I used William Lam’s excellent VCF starting page as the foundation to build my VCF 9 lab. => link
The goal of this post is not to repeat his blog, but to document the things I did differently, the parts that didn’t work as expected, and the tweaks required to get everything running smoothly in a compact 2-node homelab setup.
Content blog article
1. Hardware BOM
Luckily, I purchased most of this hardware before memory prices went completely insane 😅
| Hardware | Type | Price | Website |
| Compute | MINIS FORUM MS-A2 AMD Ryzen 9 9955HX | 935€ x2 | Amazon |
| Memory | Crucial 128GB DDR5 RAM Kit (2x64GB) | 443€ x2 | Amazon |
| ESXi Boot Disk | SAMSUNG 990 EVO Plus 1TB | 85€ x2 | Amazon |
| Memory Tiering Disk | Samsung SSD 990 Pro NVME 1TB | 108€ x2 | Amazon |
| VSAN Disk | Samsung 990 EVO PLUS 2TB M.2 SSD | 129€ x2 | Megekko |
| Rack | DeskPi RackMate T2 Rackmount | 231€ x2 | Amazon |
| Rack Shelf | GeeekPi 1U Rack Shelf | 27€ x3 | Amazon |
2. Licensing your VCF instance
You have two realistic options to license VCF for a homelab.
Option 1 – vExpert (Free)
Becoming a vExpert gives you access to VCF licenses.
Joining the vExpert community has been one of the best things that happened to me professionally — expanding my network, learning from incredibly smart people worldwide, and pushing me to a higher level both personally and professionally.
Option 2 – VMUG Advantage ($210)
You can also purchase a VMUG Advantage membership:
👉 https://www.vmug.com/membership/vmug-advantage-membership/
This gives you:
- A 128-core VCF license
- Discounts on training and certifications
⚠️ Requirement:
At the time of writing, you need either the VCF-Admin or VCF-Architect certification to obtain the VCF licenses. This requirement may change in the future.
3. Installation steps
IP configuration
| FQDN | IP Address | Function |
|---|---|---|
| dc01.vkasaert.com | 10.10.10.10 | DNS Server |
| esx30.vkasaert.com | 10.10.20.30 | Physical ESXi Host 1 |
| esx31.vkasaert.com | 10.10.20.31 | Physical ESXi Host 2 |
| sddcm.vkasaert.com | 10.10.30.40 | VCF Installer / SDDC Manager |
| vc-vcf.vkasaert.com | 10.10.30.41 | Management Domain vCenter |
| nsx01a.vkasaert.com | 10.10.30.42 | NSX Manager node |
| nsx01.vkasaert.com | 10.10.30.43 | NSX Manager VIP |
| opspn01.vkasaert.com | 10.10.30.44 | Operations |
| opsfm.vkasaert.com | 10.10.30.45 | Operations Fleet Manager |
| opscp01.vkasaert.com | 10.10.30.46 | Operations Cloud Proxy |
| auto.vkasaert.com | 10.10.30.47 – 48 | VCF Automation |
| edge01a.vkasaert.com | 10.10.30.49 | NSX Edge 1a |
| edge01b.vkasaert.com | 10.10.30.50 | NSX Edge 1b |
3.1 Install ESXi
The MS-A2 systems already shipped with the latest firmware, so I didn’t need to update it.
However, definitely check William Lam’s firmware blog post, as it highlights several BIOS settings that must be adjusted.
For ESXi installation:
- Update KS.CFG to match your disk layout
- Update BOOT.CFG to ensure the correct KS file is used
After installation, verify that Memory Tiering is active.
I installed 128GB of physical RAM per node, so ESXi should report ~256GB available memory once tiering is active.

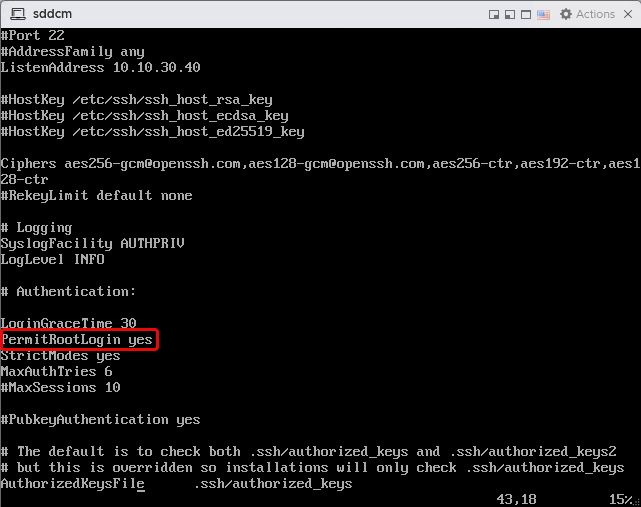
3.2 Enable SSH Access to SDDC Manager
Edit the SSH configuration => vi /etc/ssh/sshd_config
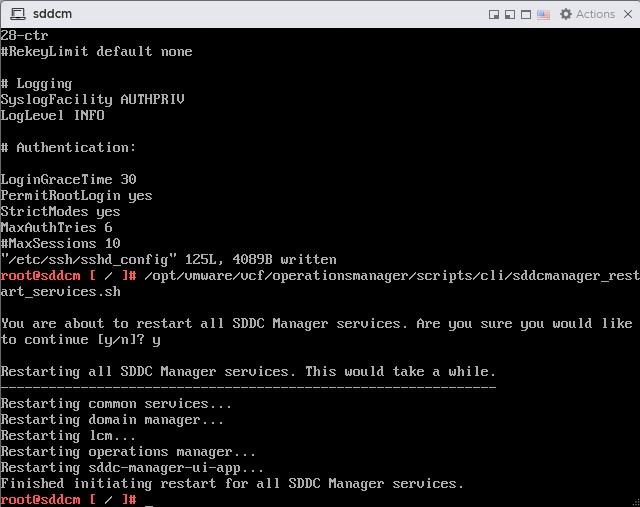
Change PermitRootLogin to yes
Reboot the SDDC Manager.
After the reboot, SSH access will be available.
3.3 Enable 2-Node Deployment
William’s script didn’t work for me, but the manual changes are minimal.
Edit /home/vcf/feature.properties and add the entries belowfeature.vcf.internal.single.host.domain = true
feature.vcf.vgl-29121.single.host.domain = true
feature.vcf.vgl-43370.vsan.esa.sddc.managed.disk.claim = true
Edit /etc/vmware/vcf/domainmanager/application.properties and add the entries belowenable.speed.of.physical.nics.validation = false
vsan.esa.sddc.managed.disk.claim = true
Restart SDDC services:/opt/vmware/vcf/operationsmanager/scripts/cli/sddcmanager_restart_services.sh
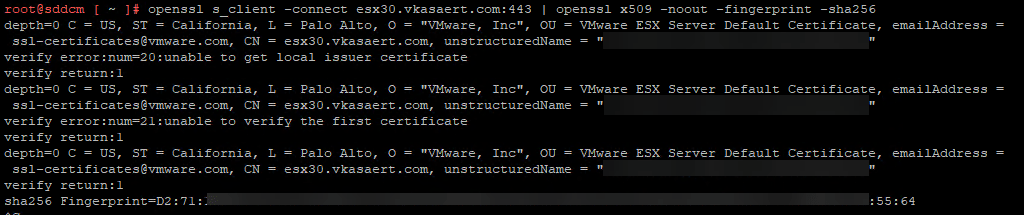
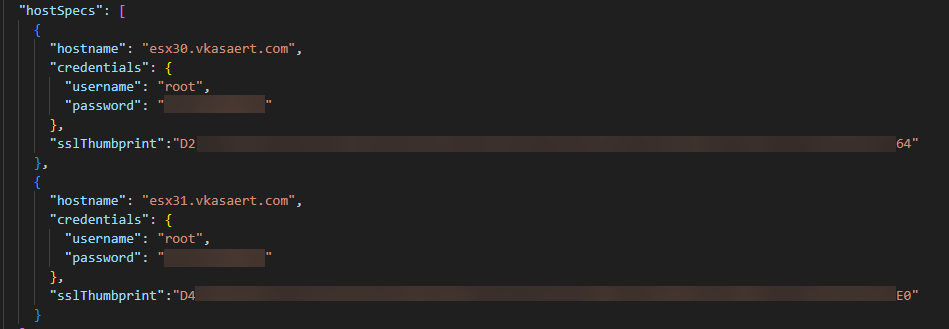
3.4 Retrieve ESXi SSL Thumbprints
Even with "skipEsxThumbprintValidation": true in my JSON, the deployment still complained.
From the SDDC Manager, run this for each ESXi host: openssl s_client -connect esx30.vkasaert.com:443 | openssl x509 -noout -fingerprint -sha256
You’ll find the information you need on the last line
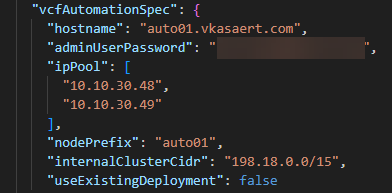
3.5 Create the Deployment JSON
Changes required:
Add the SSL thumbprints retrieved above
Add one extra IP address for the Aria Automation deployment
3.6 Install!!
Start the deployment and don’t forget to execute the vSAN fix PowerShell script during installation.
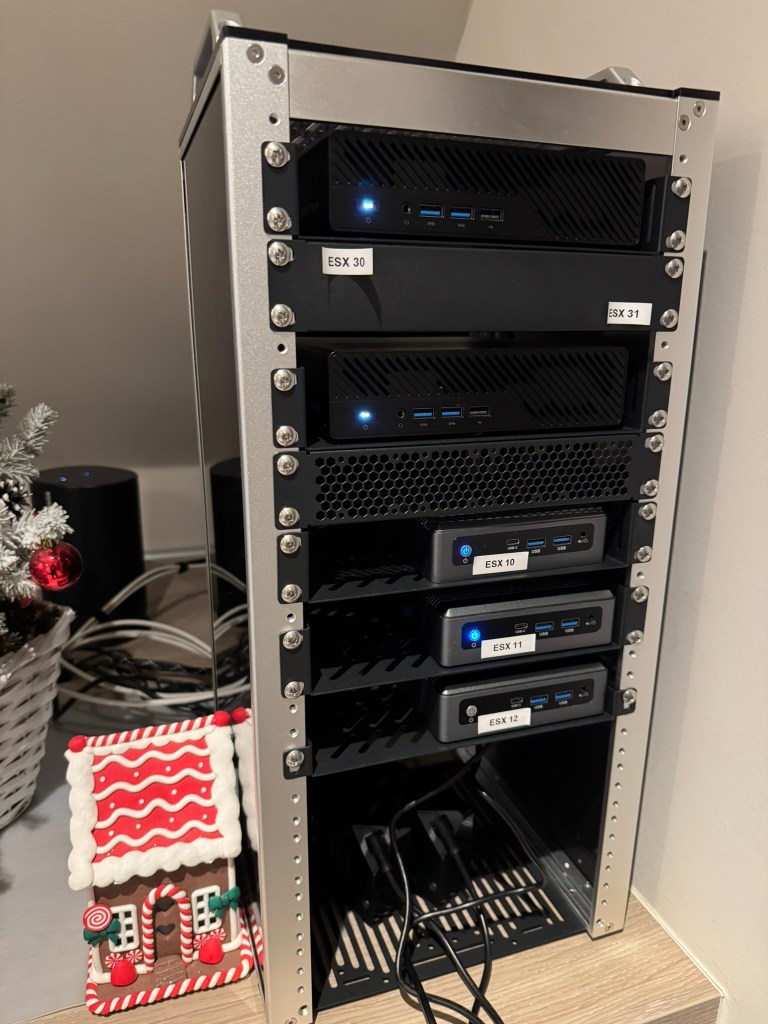
3.7 Final result
This is the final result — a fully functional VCF 9 homelab in a compact 2-node setup.
And yes… there’s still plenty of room to expand 😁