In the first part of this series, we covered the essential post-deployment tasks for VMware Cloud Foundation 9, including licensing, depot configuration, Operations components, and backup configuration.
In this second part, we’ll focus on configuring NSX and setting up network connectivity for the environment. We’ll deploy the Edge Cluster, configure gateway uplinks, and finish by adding a static route in NSX.
Content blog article
1. Configure NSX
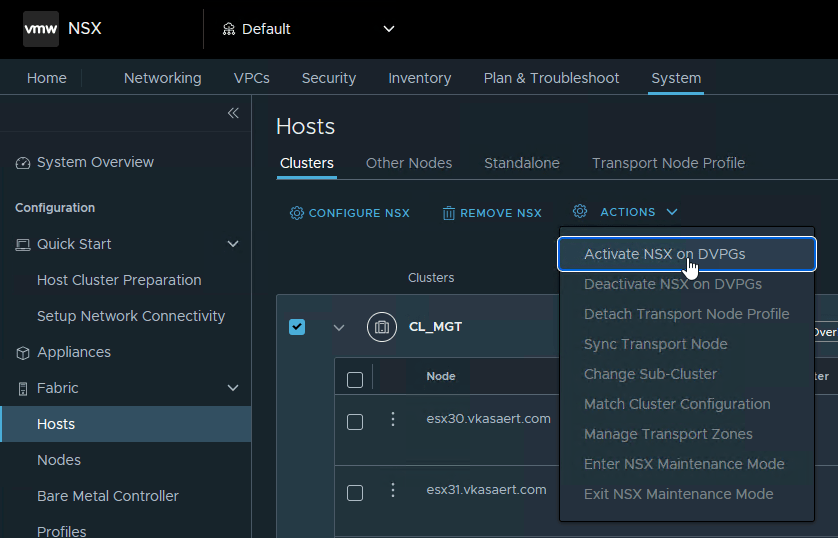
First, we need to activate NSX on the Distributed Virtual Port Groups (DVPGs).
Log in to your NSX Manager and navigate to: System → Fabric → Hosts
Select your cluster, click Actions, and choose: Activate NSX on DVPGs
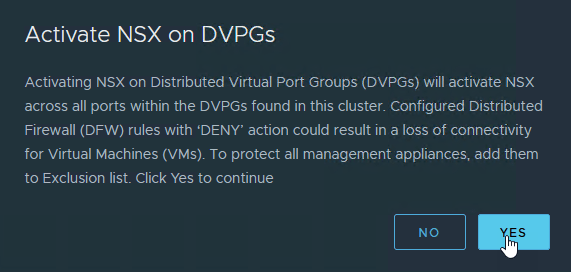
Confirm the action by clicking Yes.
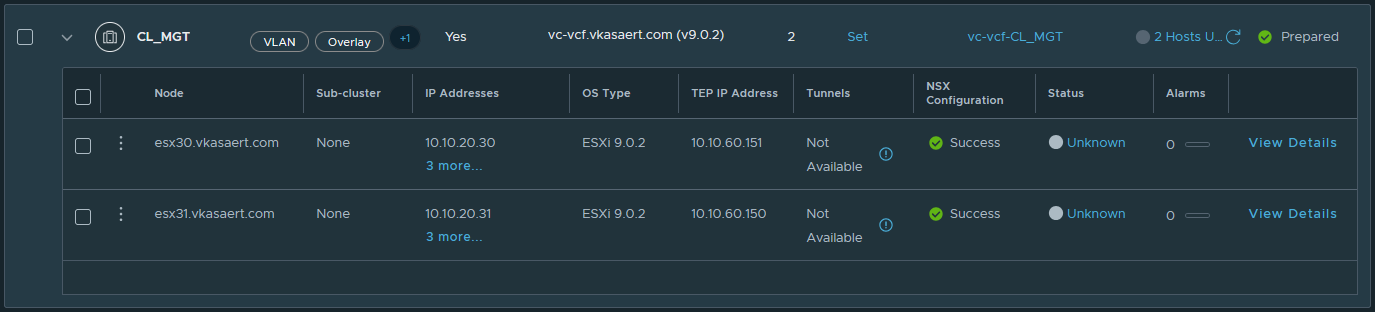
Wait until the NSX configuration completes successfully before continuing.
2. Configure Network Connectivity
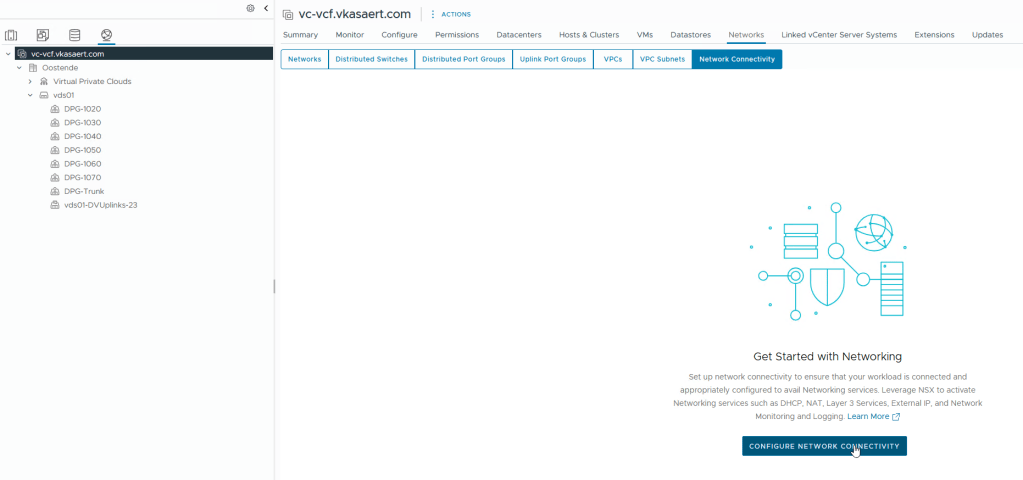
Next, we’ll configure the network connectivity for the environment. Navigate to your vCenter object and on the right-hand side go to: Networks → Network Connectivity
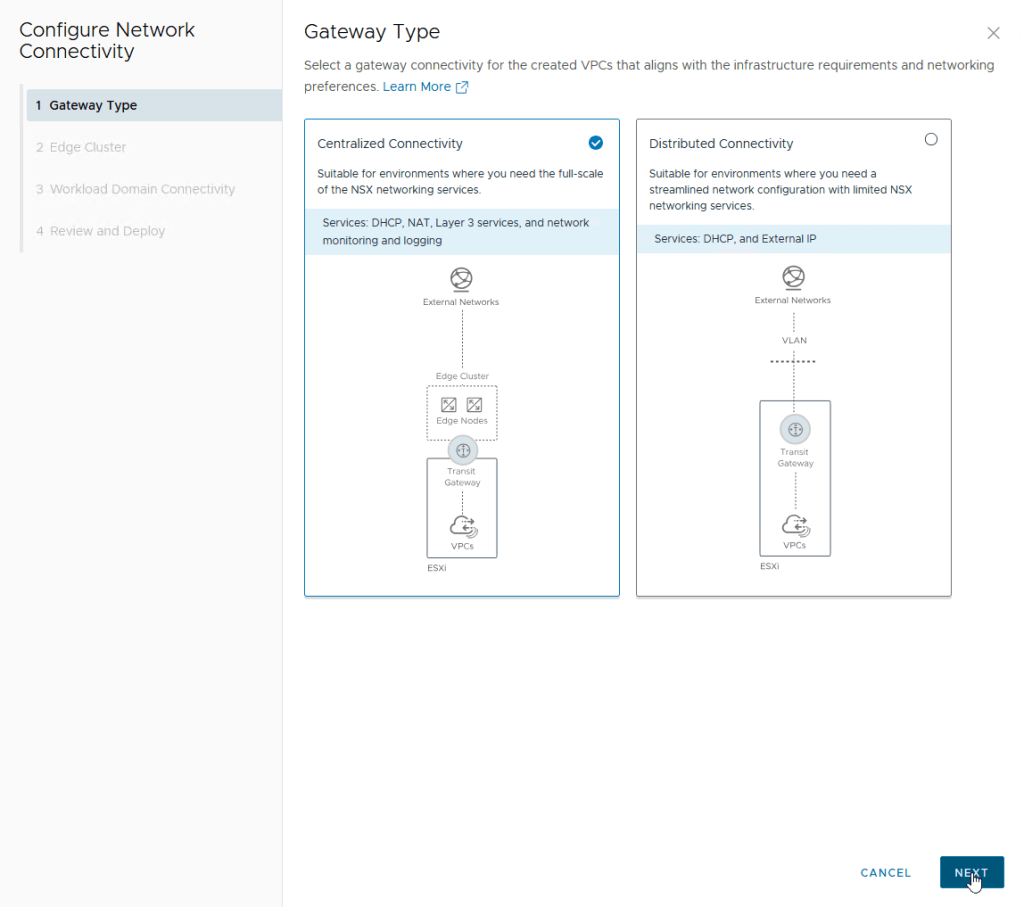
Click Configure Network Connectivity to start the wizard.
Choose the type of gateway you want to deploy. Since I want to experiment with additional services in my homelab, I selected the Centralized Connectivity setup.
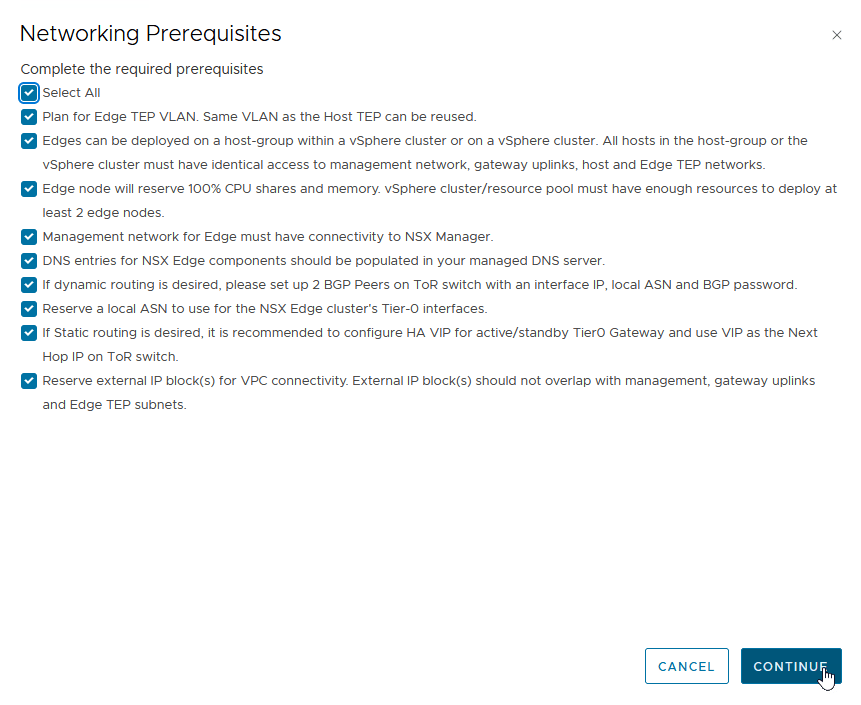
Before continuing, carefully review the prerequisites. In my case, I learned the hard way that if you plan to use static routing, you must configure the Tier-0 Gateway in an Active/Standby setup.
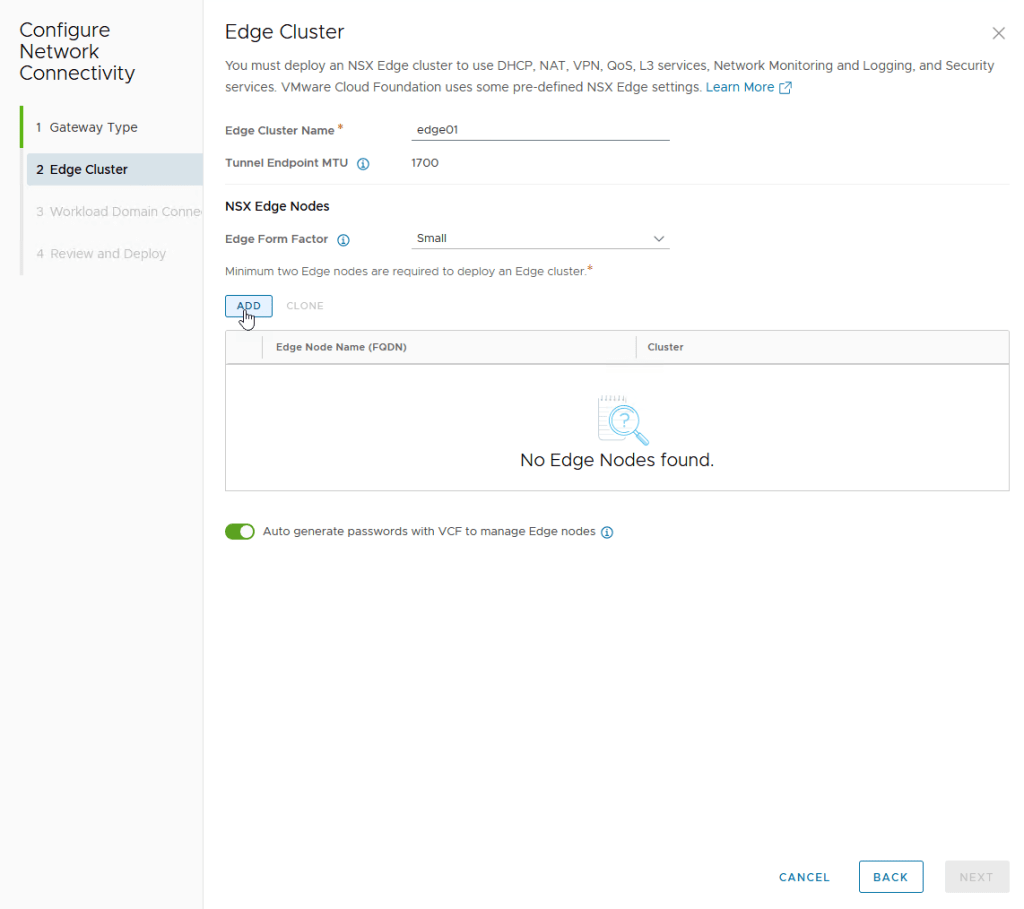
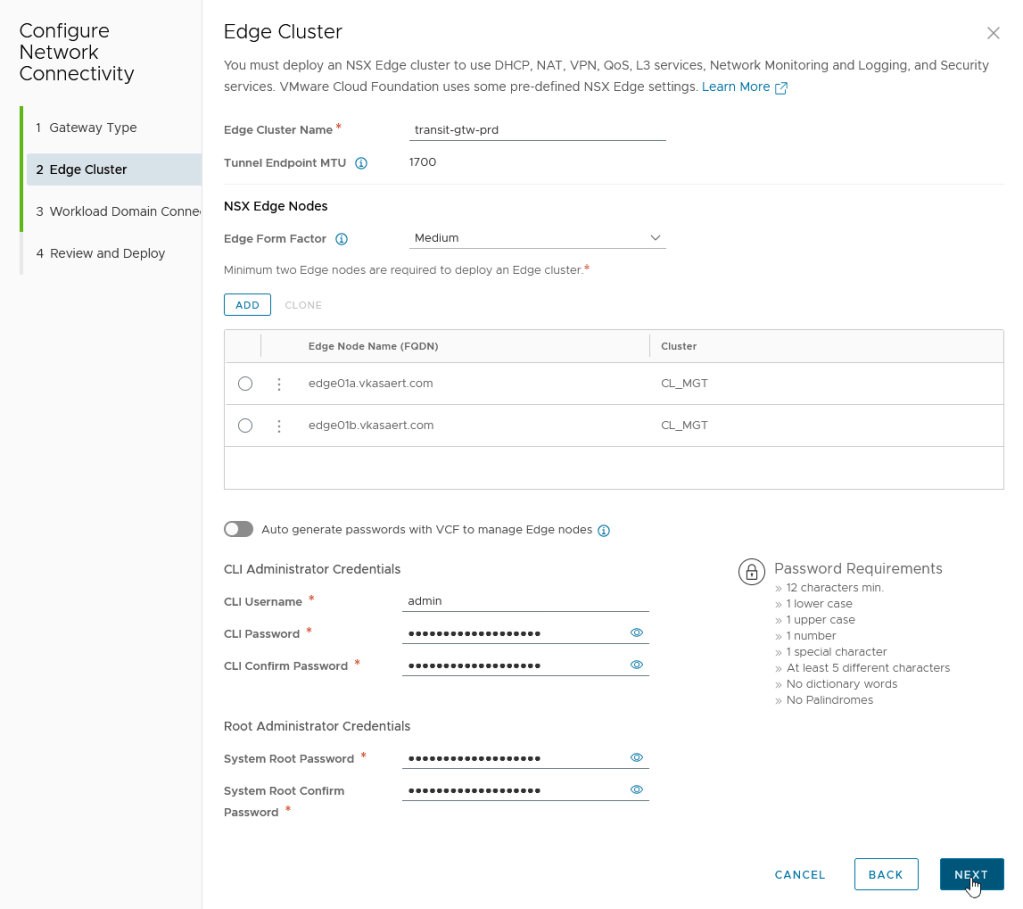
Provide a name for your Edge Cluster and select the desired form factor.
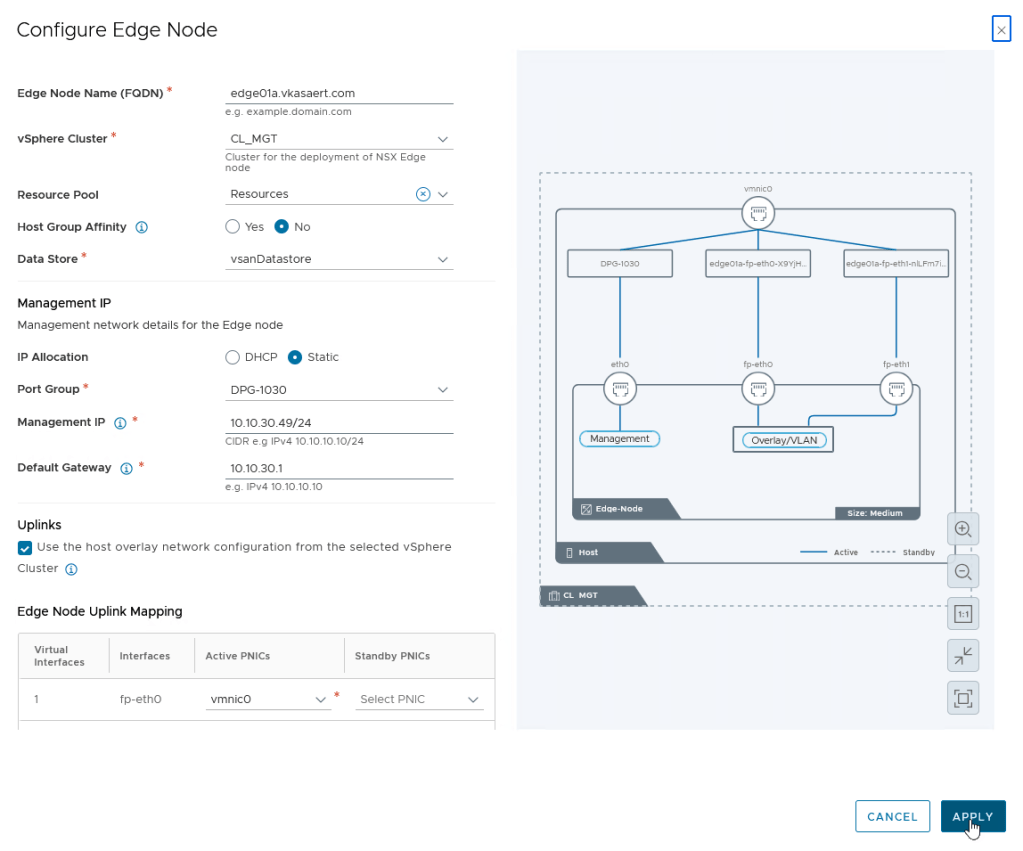
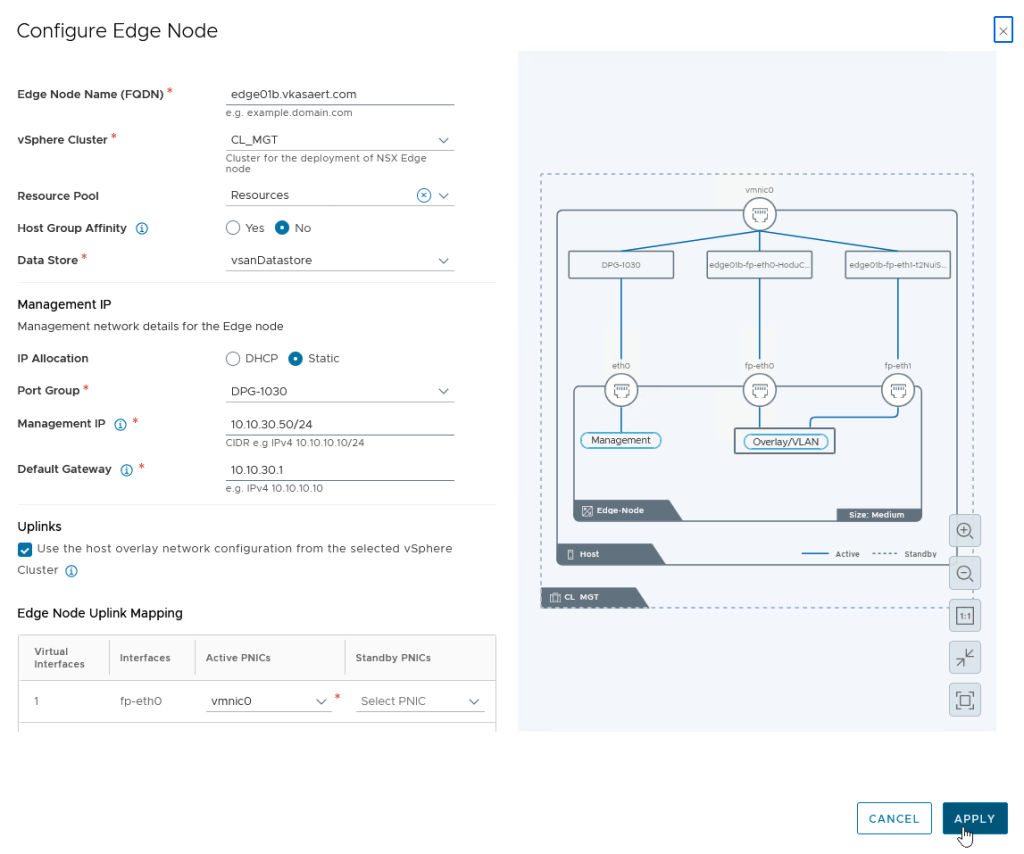
Next, configure the first Edge Node by filling in the required deployment details.
Repeat the same process for the second Edge Node.
After configuring the Edge Nodes, you can choose to:
- Automatically generate passwords
- Manually define passwords
If you allow VCF to auto-generate passwords, keep in mind that you will need to retrieve them later through API calls.
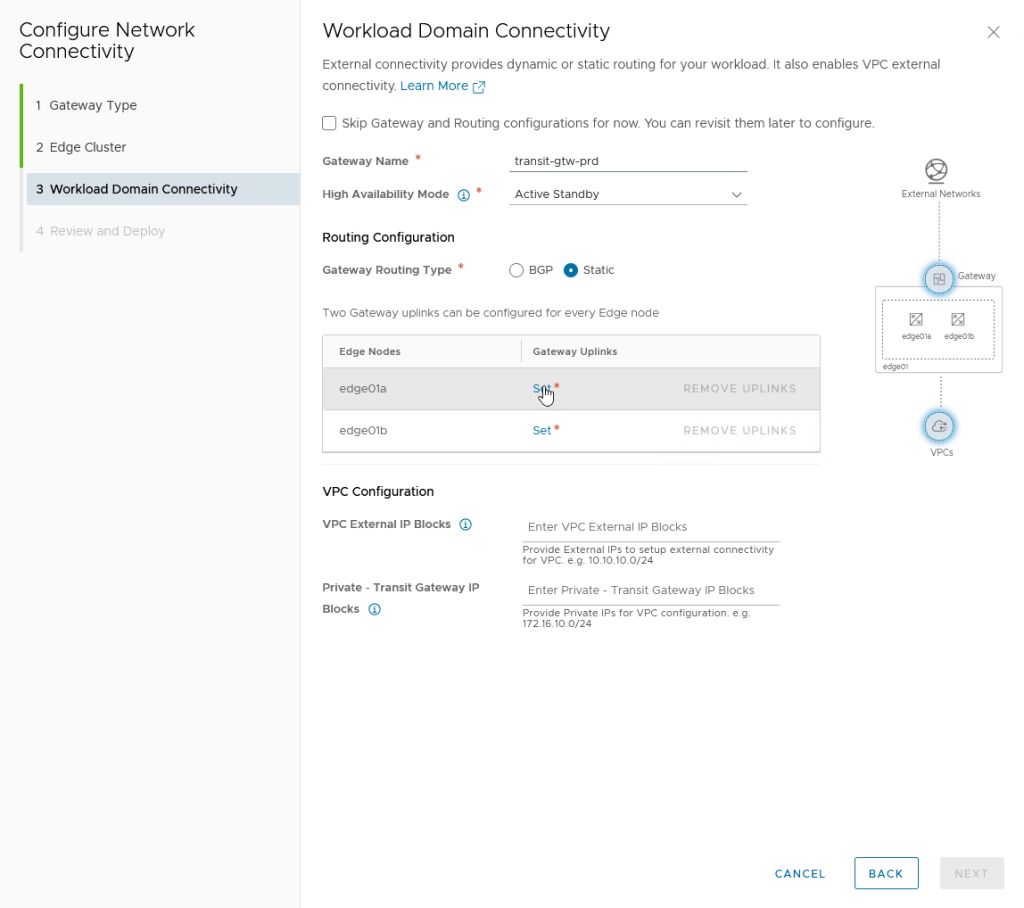
Select the desired High Availability mode.
As mentioned earlier, if you plan to use static routing, make sure you select an Active/Standby configuration for the Tier-0 Gateway.
Next, configure the Gateway Uplinks by clicking Set.
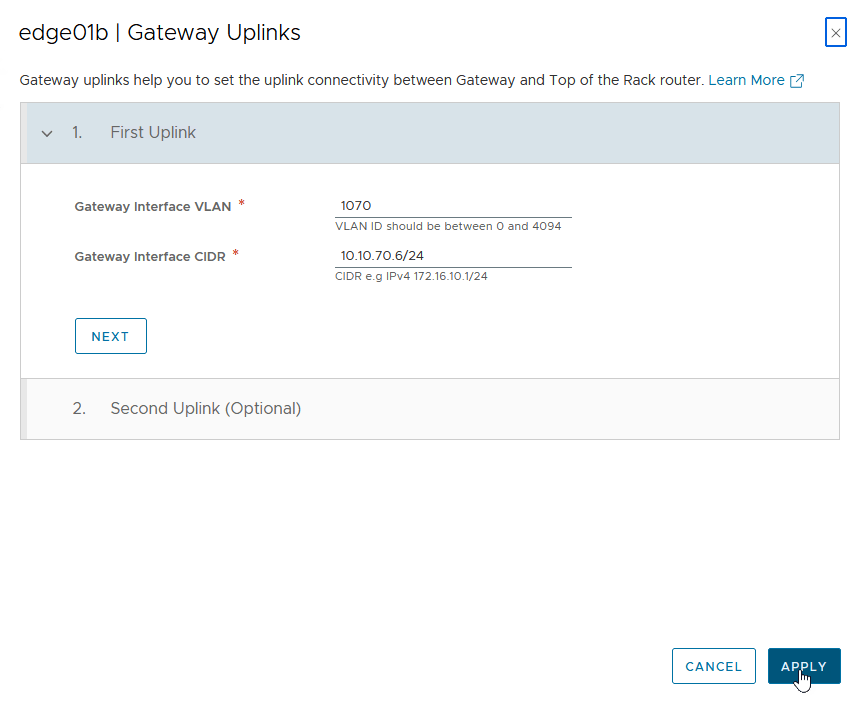
Fill in the required uplink configuration details for the first Edge Node. The second uplink is optional depending on your setup.

Repeat the same configuration for the second Edge Node.
Now configure the required network ranges for:
- Private VPC blocks
- External networks
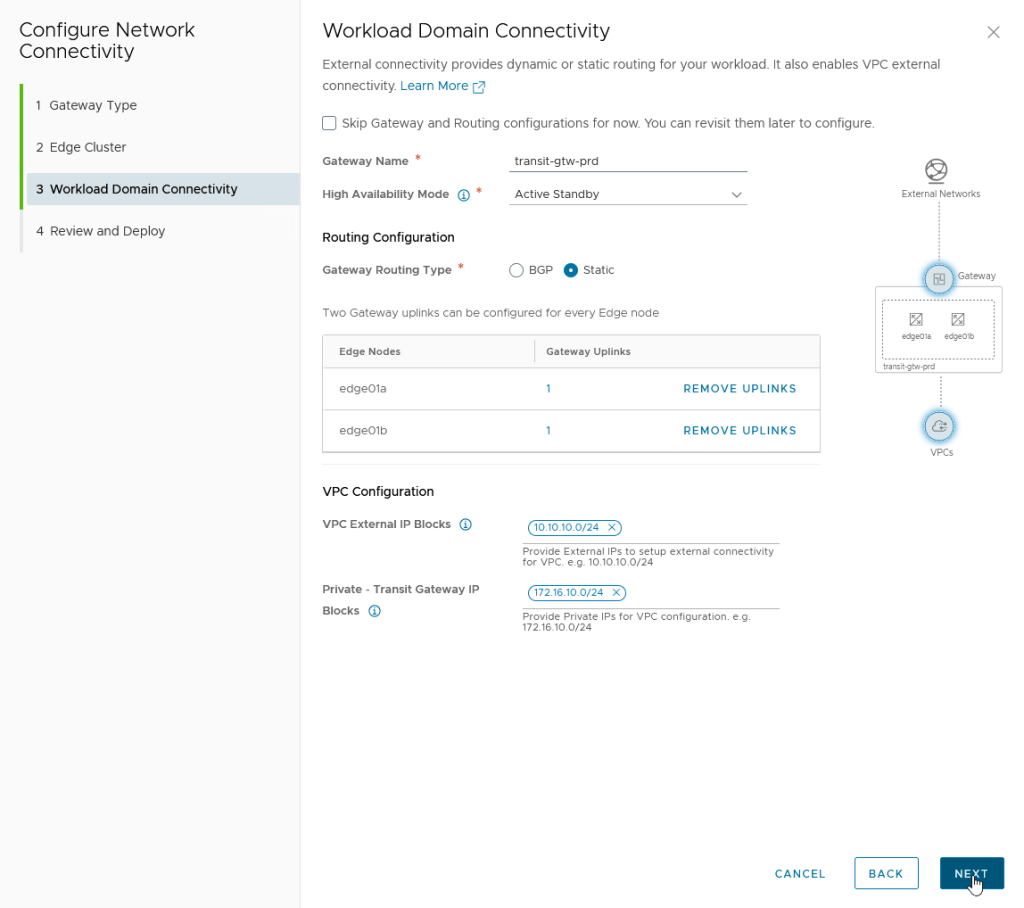
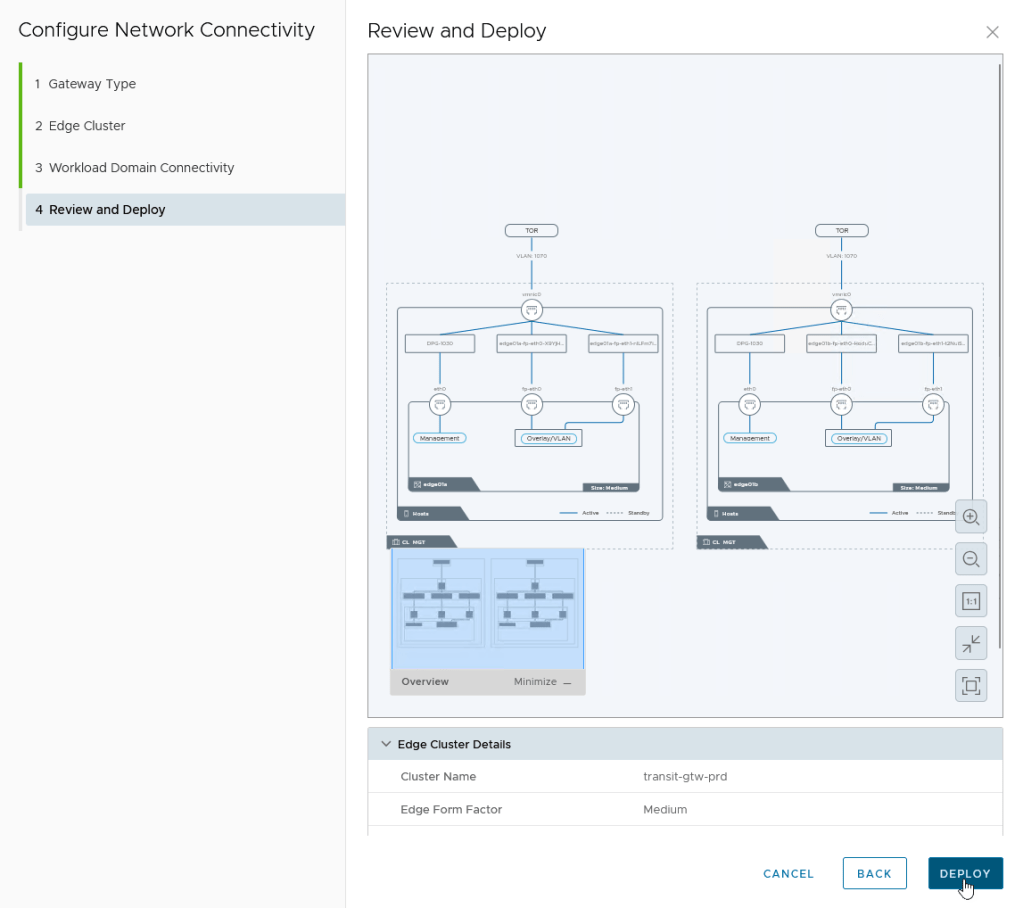
Once everything is configured, click Deploy to start the Edge Cluster deployment.
In my environment, the deployment process took an unusually long time. After some troubleshooting, I came across a blog post from William Lam describing an issue related to the MS-A2 platform.
His PowerShell script resolved the deployment issue in my lab, so if you encounter similar behavior, I highly recommend checking out his article.

3. Configure your static route on NSX
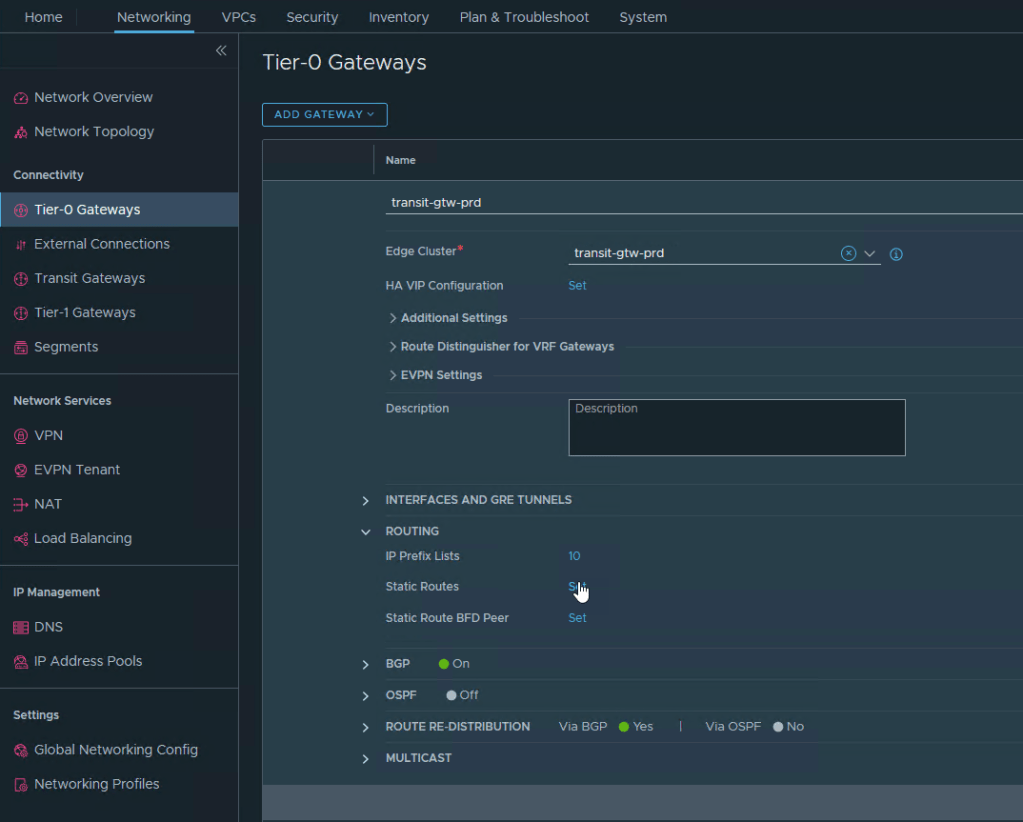
Now that the Edge Cluster is deployed, we can configure a static route in NSX. Navigate to:
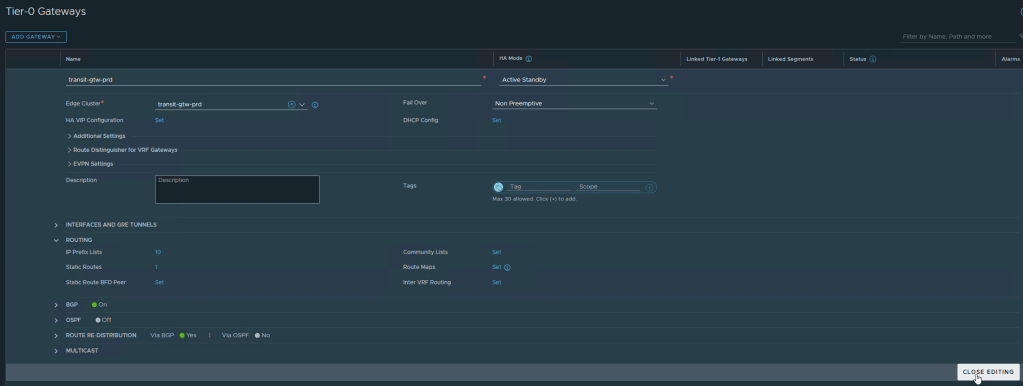
Networking → Connectivity → Tier-0 Gateways
Click Set next to Static Routes.
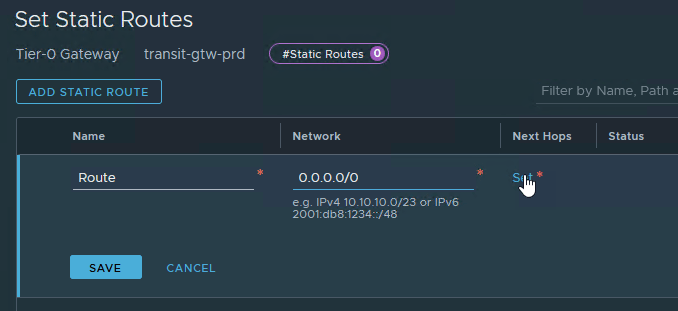
Next, click Add Static Route.
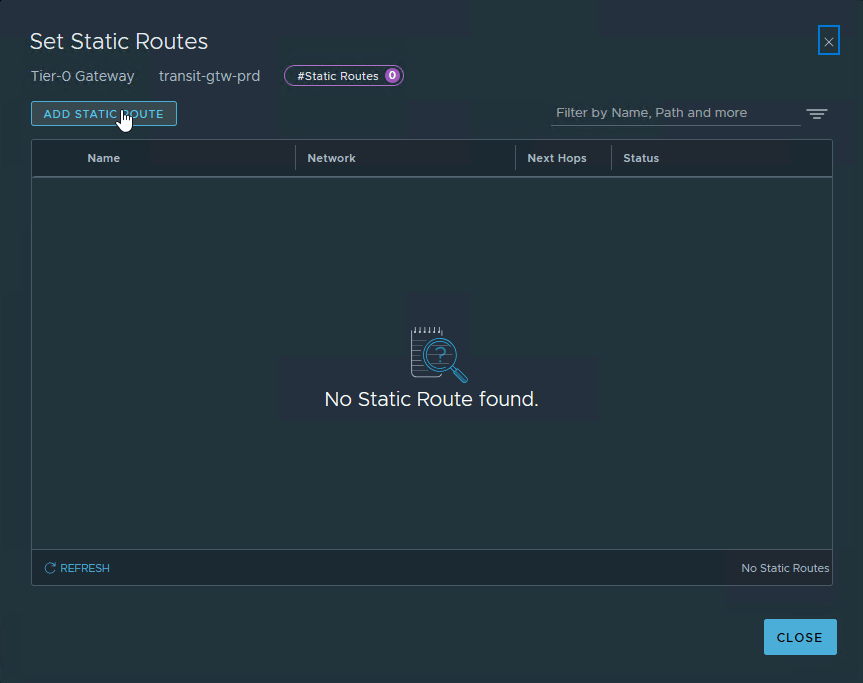
Provide a name for the route and enter: 0.0.0.0/0 as the network. After that, click Set to configure the Next Hop.
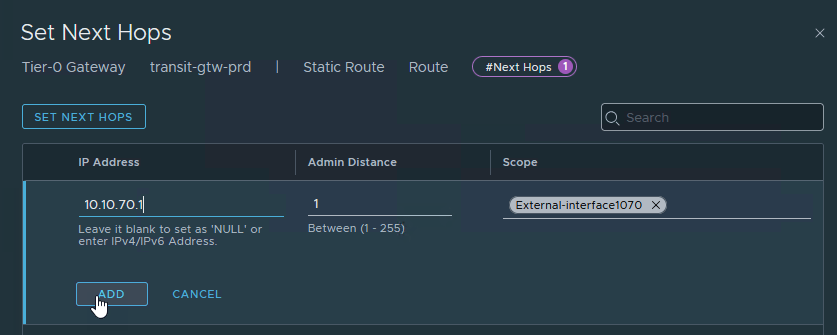
Configure:
- The next hop IP address
- The administrative distance
- The interface connected to the upstream network
Click Add once completed.
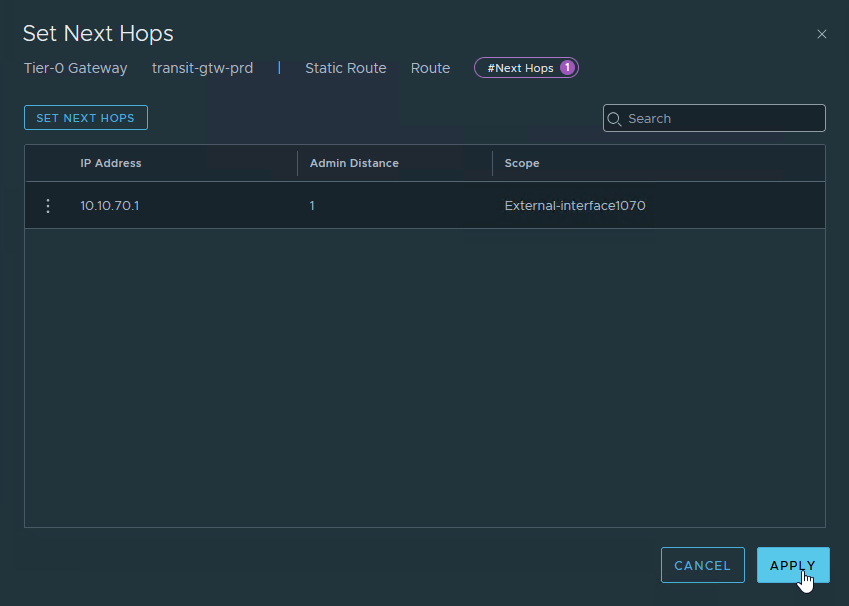
Click on “Apply”
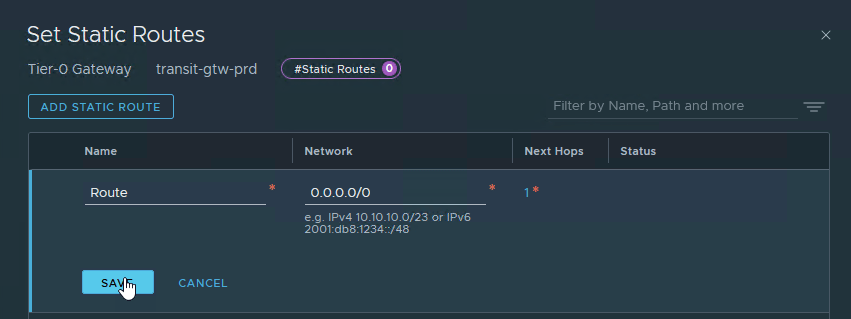
Click on “Save”.
And now to finish it off click on “Close Editing”.
Yes… NSX really wants to make sure you mean it 😄
3. Final thoughts
With NSX and network connectivity configured, the VCF 9 environment starts becoming much more flexible and production-like.
The deployment process itself is fairly straightforward, but there are still a few important prerequisites and design decisions that can easily cause issues later on — especially around Tier-0 gateway configuration and routing design.
Hopefully, this walkthrough helps you avoid some of the mistakes I encountered while building out my homelab environment.
