Every day you learn something new is a good day in my opinion 🙂 Well today I learned how I had to copy files from my vCenter appliance.
For my support request with Lenovo on the Xclarity Integrator integration (on which I promised an article as well, don’t worry I didn’t forgot 😀 ) I had to copy some files from my VCSA. As you can activate SSH on your VCSA I thought you could simply connect with winscp to your VCSA, connect with root and copy over the files you need. However there is an extra step to take on your VCSA.
Below you will find all the steps on how to do that with winscp.
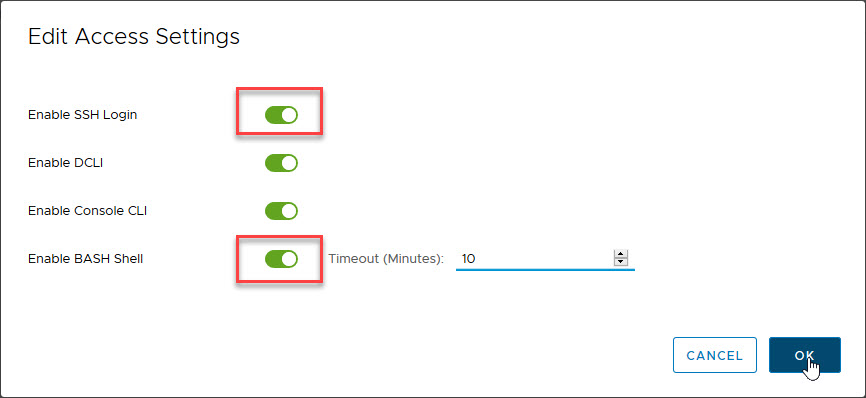
1. First connect to your VCSA VAMI interface https://fqdn_of_your_vcenter:5480 and connect with your root account. There go to the “Access” subsection and click on edit.

In your “Edit access settings” make sure that you enable the SSH login and Bash shell. Alternatively you can configure a timeout which is handy if you tend to forget things like me.
2. Now you need to connect with putty to your VCSA.
- Connect with root
- Access the shell by executing the “shell” command
- And the magic step is to change the default shell to “Bash Shell” by executing ” chsh -s /bin/bash root “

3. Now you will be able to connect to your VCSA with winscp over SCP.
4. Once you’re finished with copying over your files you’ll need to set the default shell back to the “Appliance shell” by executing “chsh -s /bin/appliancesh root”. This is done in your putty session to your VCSA.

