A while ago I promised an article about the deployment of Lenovo Xclarity Integrator. The added value of deploying this Integrator is to do rolling firmware upgrades on your Lenovo hardware. This allows you to upgrade a complete cluster without the need to constantly check the deployment in the Xclarity Administrator. It will automatically take care of the firmware upgrades on your ESX’es, maintenance mode, etc… So in short it will simplify the deployment of firmware updates.
Today that deployment is done and I can share the implementation steps that will lead to a working Xclarity Integrator. Our environment consists of vSphere 6.7 U1 hosts and we already have a deployed Xclarity Adminstrator v2.3.0. You can find the support matrix and download section here.
As you can see in below table we could only deploy Integrator v5.5.0 as it’s the only version that is compatible with our version of Xclarity Administrator.

If you have a multi-tenant environment like me, which has a lot of firewalls make sure that you checkout the needed network requirements here.
1. OVF deployment
Once you downloaded the OVA from the Lenovo website above you can start the process to “Deploy OVF template” from your vCenter. There you fill in all the required fields and wait till the process is finished. However DO NOT start the VM yet. You first need to create an ISO with your IP configuration as explained here.
In short
1. Create a file named “eth0_config” (with no file extension)
2. In the file you fill in your IP settings as you can see below.

3. Once you saved the file you need to convert it to an ISO file which you can do on Linux with this command : mkisofs -J -o test1.iso ./eth0_config. Unfortunately I didn’t find how to do it on windows because I have a lot of Linux people here that did that quickly for me.
4. Attach the created ISO to your VM you just deployed. Make sure the ISO is connected and then you can Power on your Integrator. It will automatically take the IP settings from the file for the config
2. Initial setup
Once the OVF deployment is done you can connect to your appliance on https://ip-address-of-appliance/admin
1.Accept the license agreement and click next

2. Fill in Hostname / Domain Name and DNS and click on next. I blurred out my settings. In the IP settings you can also check your current IP settings.

3. Once that initial config is done you go to “Date And Time” section and configure your NTP server

3. Register your vCenter
1.Best thing you can do is to first create a service account to register your vCenter in the Xclarity Integrator. Later on in the process this service account will receive the needed rights to interact with the vCenter. Click on register to start the process.

2. Here you can choose to connect to a PSC or to a vCenter. I connected to my vCenter. In the first block you fill in the service account you created. In the administrative user you fill in your own credentials with administrator privileges to the vCenter. Checking the “Grant the needed privileges automatically” will make sure that the service account will receive the needed rights in the vCenter.
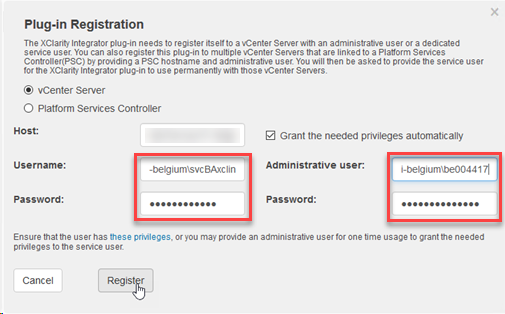
3.Once your vCenter is registered you will see it in the list

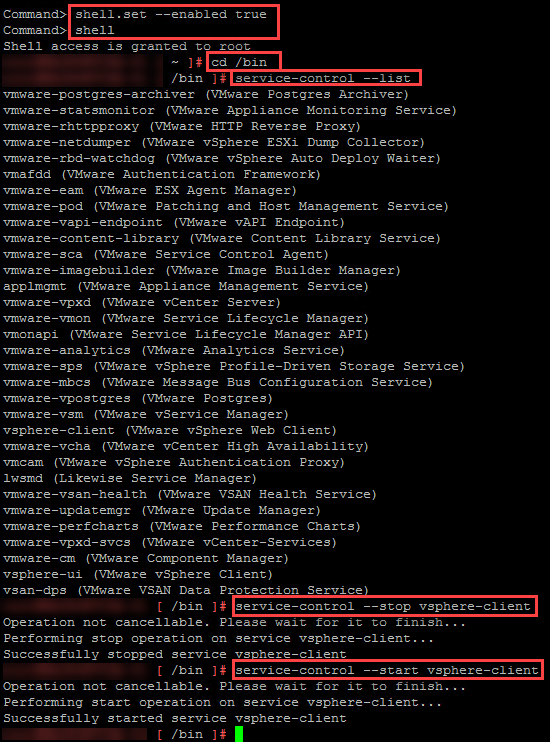
4. Now you need to login with your service account to the vsphere webclient. But you need to connect to the old FLEX client (Flash). This is really important as Xclarity Integrator v5.5.0 doesn’t support the HTML version yet. If you would not execute this step the plugin will not be registered in the vCenter. You can check the plugin on your vCenter in below location.

5. Now you should see the Lenovo Xclarity Integrator tab in the “Monitor” section of one of your clusters.

6. In case you don’t see the plugin then you’ll need to restart the vsphere-client service in your vCenter as you can see below.
4. Configure connection to Xclarity from vCenter
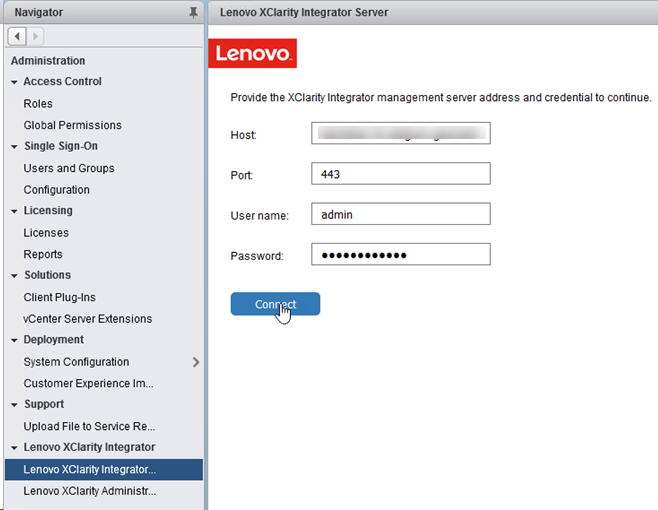
1.Still logged on with your service account go to Home => Administration. At the end of the list you should see the Lenovo Xclarity Integrator fields that need to be filled in.
Once the connection is successful you will see it in the list

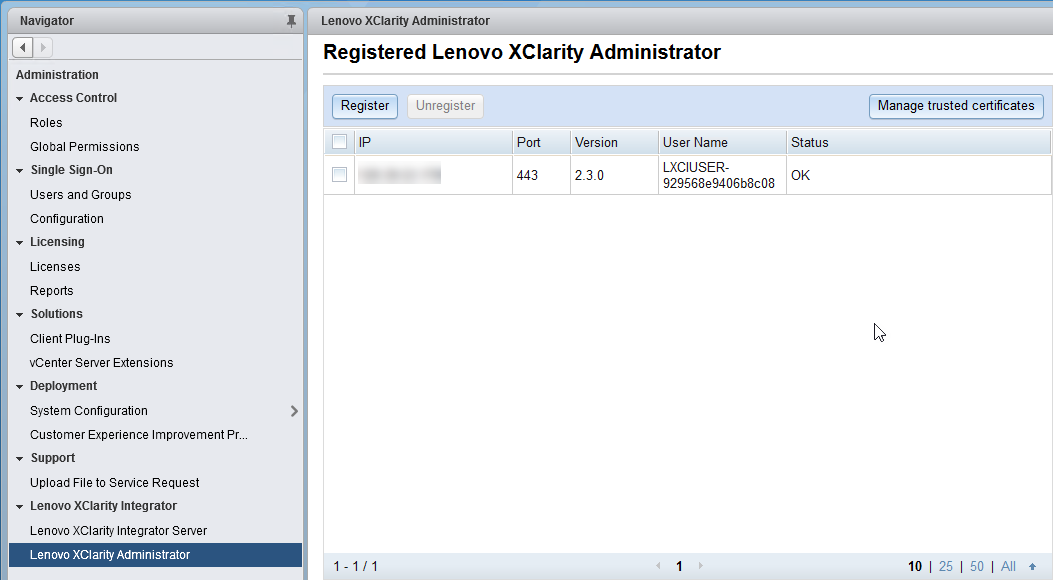
We also need to configure the connection to our Xclarity Administrator
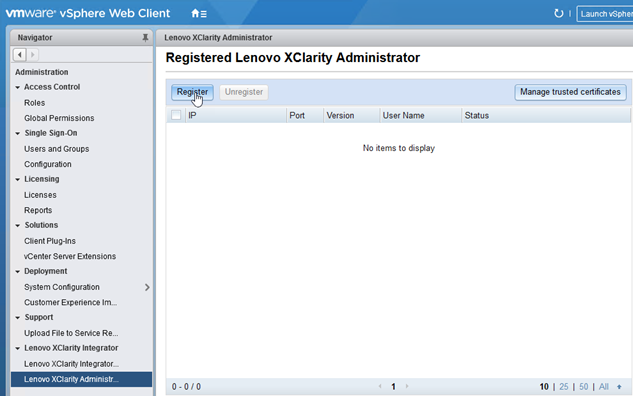
Fill in the hostname or IP of your Xclarity Administrator. I selected the option to create a new account with my administrative account.

Accept the certificate to trust it.

After you trust the certificate the Xclarity Administrator will be shown in the list.
5. Conclusion
Now you’re set to start your rolling firmware upgrades. On 17th of April 2019 version 6.0 of the Xclarity integrator will be available for download. This version should support the HTML version of the webclient. So I’ll certainly roll out that version once it’s available 😀
