In Part 3 we’re going to finalize the configuration of our vRA deployment.
Content blog article
- Configuration
- Create entitlements
- Create service
- Create blueprint
- Create entitlement
- SRM integration
- vRO SRM plugin
- Cloudclient install on SRM servers
- Create entitlements
- Encountered issues
- Adding vSphere endpoint failed
- Adding Directory fails with ERROR_BAD_FORMAT
- Change global timeout
Configuration
1. Create entitlements
1. Create a service
To be able to create entitlements you first need to create a service. Go to Administration => Catalog management => Services.
Give your Service a name and set the status as active.

2. Create a blueprint
In our case we were using a simple template for cloning, because the rest of the config was done by scripting. Go to Design => Blueprints and create your blueprint.
3. Create an entitlement
Now we can create our entitlement. Go to Administration => Catalog Management => Entitlements.
Click on the green plus-sign to create a new entitlement.

Fill in a name for your entitlement, set your status to active and choose your needed business group.

Click on the green plus-sign next to “Entitled services”
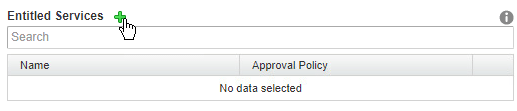
Choose the correct service you want to enable.

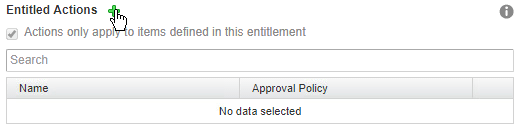
In our use case we can skip the items section, but we’ll need to add the actions. Click on the green plus-sign next to “Entitled Actions”.
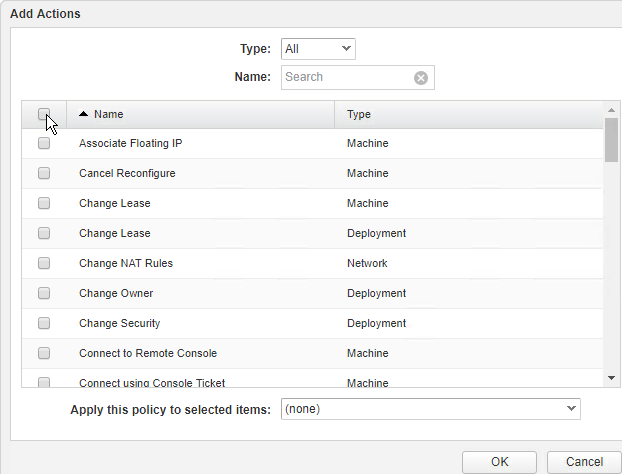
Select the check-box in the upper left corner to select all actions.
This concludes the entitlement section.
2. SRM integration
1.vRO SRM plugin
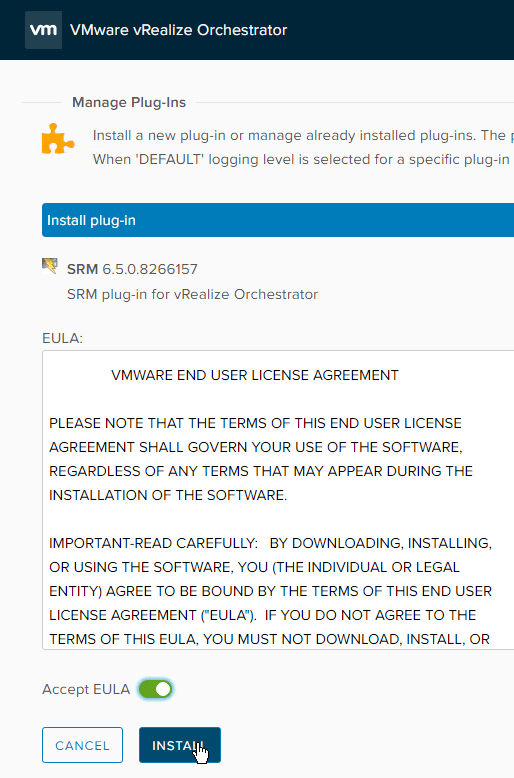
First you will need to install the SRM plugin in your vRO. In case you need new versions of the plugin, go to https://my.vmware.com and search your version of SRM, then go to drivers&tools. There you will see the SRM plugins for vRO.
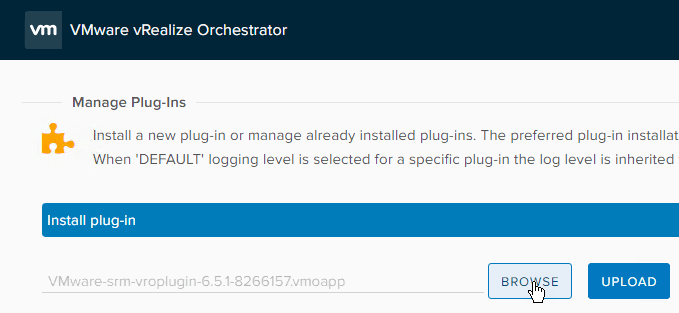
Once you downloaded the plugin you will need to install it. Go to https://fqdn_vra:8283/vco-controlcenter/config/#/ and login with root.
Go to the bottom of the page and click on Manage Plug-Ins

Click browse and go to the location of where you’ve downloaded the plugin.
Once you’ve selected you’re plugin click on upload.

Accept the EULA and click on Install.
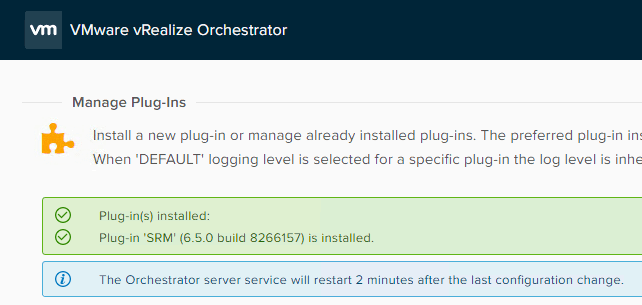
Once the installation is done you will see below printscreen.
2. Cloudclient install on SRM servers
Download cloudclient https://code.vmware.com/web/tool/4.7.0/cloudclient
Download java jre 8 https://java.com/en/download/
Install Java and when you’re finished create below system variable. After reboot you should be able to execute %JAVACMD% in a command prompt. If that doesn’t work you did something wrong 🙂

Now unzip and copy the content of cloudclient to a folder on your computer eg. C:\SRM\Cloudclient
Go to C:\SRM\Cloudclient\bin and execute CloudClient.bat

Press space bar till your at the end of your license agreement and the accept the license.

Now execute this command => vra login userpass –server loadbalanced_ip_vra –tenant vsphere.local –user configurationadmin –password YourPassword –promptForIaasCreds yes

Encountered issues
1. Adding vSphere Endpoint fails
When adding the vSphere endpoint in Infrastructure => Endpoints => Endpoints I received below error when I wanted to test the connection.

During my deployment I initially didn’t configure the advanced setting of the IaaS agents. This means they are installed with the name “proxy-agent-vsphere-01”. When checking the database we saw that the endpoints always came back in the database even though the IaaS agent was uninstalled.

Resolution: stopping and starting the IaaS manager service on the IaaS manager made sure that the new config was read from the IaaS agents.

2. Adding Directory fails with ERROR_BAD_FORMAT
When trying to link Active Directory with vRA ( Administration => Directories Management => Directories ) I got below error message. I was 100% sure that all filled in fields were correctly.

For troubleshooting purposes connect with SSH to the server you’re specifying in the sync connector. Start this command => tail -f /var/log/vmware/horizon/connector.log
There I saw this error popping up.

I came across this KB article that specified the same error I was experiencing. There wasn’t a resolution, but there was a workaround that said: Setting NetBIOS name to all uppercase characters.
I changed this setting in a real production environment and you can find my blog about it here => post
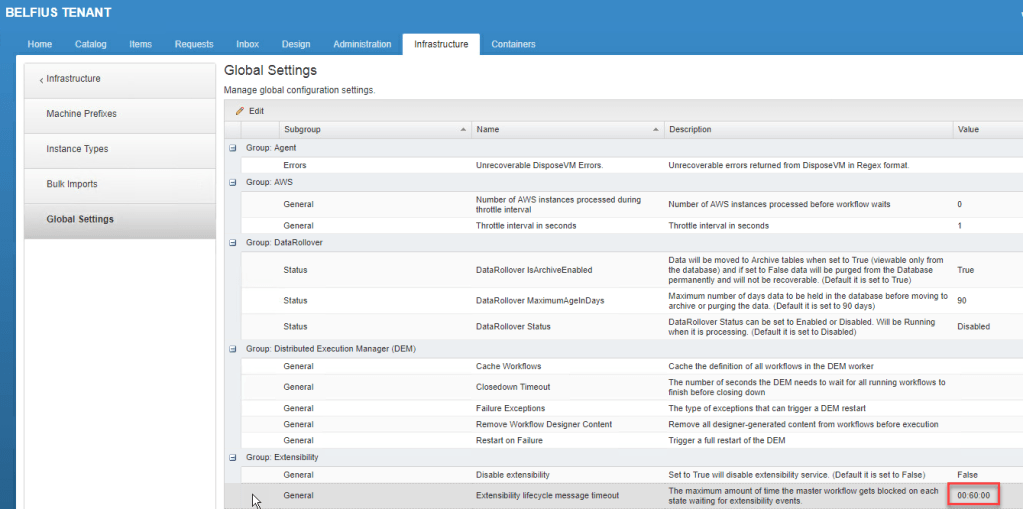
3. Change global timeout
At a certain point in time we had an issue that we exceeded the global timeout of a workflow. In case you need to increase your global timeout you can change that in => Infrastructure => administration => global settings
Conclusion
I really hope you liked these 3-part series of the vRA config. You can always leave some comments if you think improvements are needed.
