As you know from my previous post I was so eager to start deploying LCM & vRA that I downloaded the wrong version of the appliance. So currently I’m at 8.2 while the latest version is 8.3.
In this article I will update LCM & vRA to 8.3 and VIDM will be upgraded to 3.3.4.
Content blog article
- Upgrade LCM
- Update your product support pack list
- Add the necessary binaries
- Upgrade your environments
- VIDM offline upgrade
1. Upgrade LCM
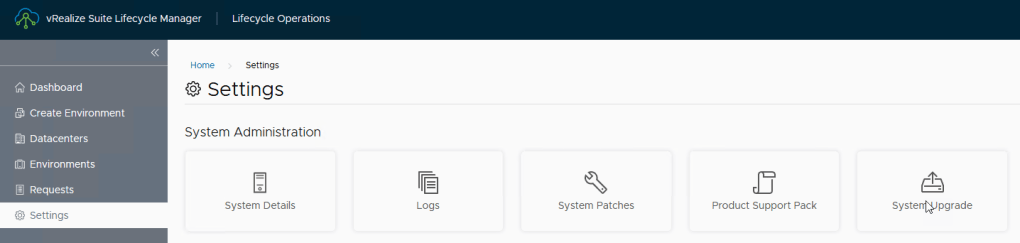
Go to the FQDN of your LCM appliance. In my case it’s https://lcm8.vkasaert.local
Login and click on LifeCycle operations.

Go to Settings => System Upgrade
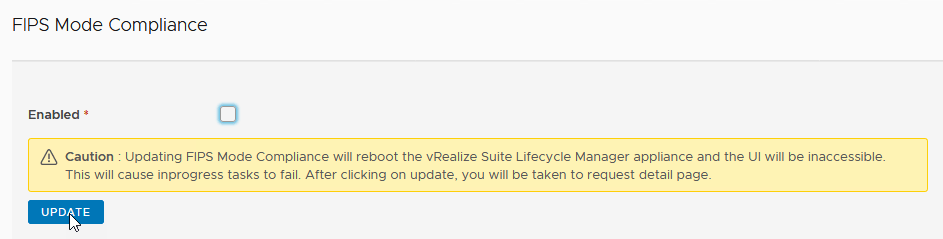
I had FIPS enabled, this was probably enabled during the initial install where I didn’t pay attention to it. So if we want to upgrade our LCM appliance I need to remove this setting. Just click on “here” to change that setting.

Uncheck FIPS.

Click on update and wait till your appliance is rebooted.
Go back to LifeCycle operations => Settings => System Upgrade.
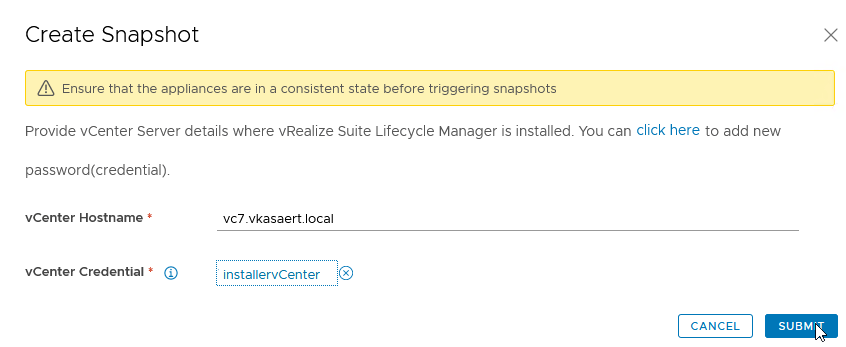
Create a snapshot of your appliance. Click on “Create Snapshot”. I would certainly recommend to take a powered off snapshot. But if your prefer you can also create a snapshot here.

Enter the name of your vCenter. For the vCenter Credential you can select the “InstallervCenter”. This one contains the correct credentials for creating the Snapshot.
You can follow your snapshot request when you click on “Click here”. You will be redirected to the Requests page.
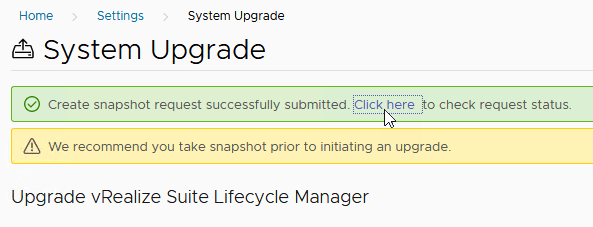
Click on “Check For Upgrade”

As you can see in the red square there is an upgrade available. Click on Upgrade to start the upgrade.

2. Update your Product Support Pack list
In case you have an older version of LCM it’s always good to see if the products you want to deploy are in the supported list. This can be checked if you go to => LifeCycle operations => Settings => Product Support Pack

In case your product you want to deploy isn’t mentioned in the list then you can click on “Check Support packs online” to update.

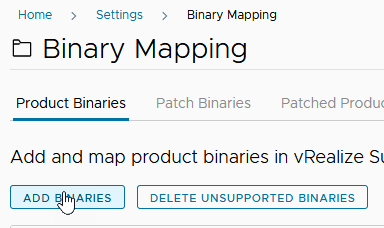
3. Add the necessary binaries
Go to LifeCycle operations => Settings => Binary Mapping

Click on “Add Binaries”. You can also delete some binaries, if you no longer need them.

I’m going to add My VMware account first, just click on “Click here” to add them. I’m not going to show the screens to add your account to LCM, but you can do that if you go to LifeCycle operations => Settings => My VMware. Once you added your account you can click on “Discover”.
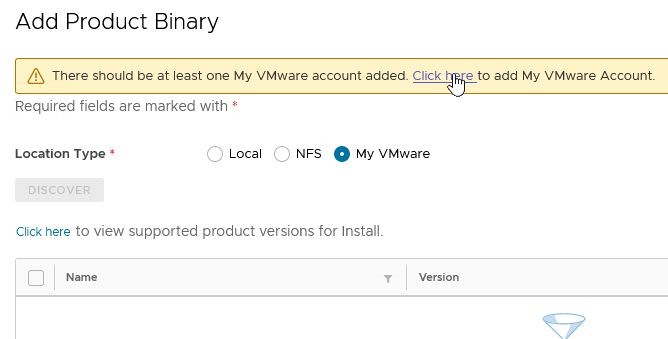
I’m adding the upgrade for VIDM 3.3.4 / upgrade for VRA 8.3 & the install for Log Insight.

You will need to wait untill the download is finished.
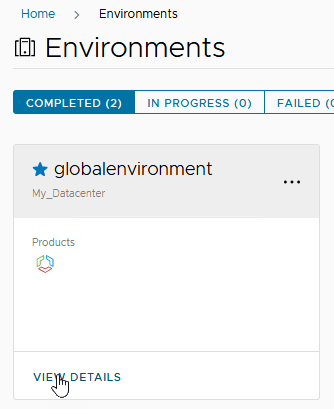
4. Upgrade your environments
Go to LifeCycle operations => Environments and click on “View Details”

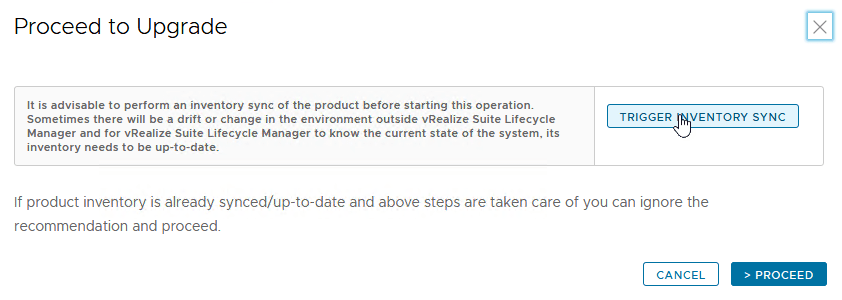
Click on “Upgrade”. I would recommend to take an offline snapshot, because I had issues during my upgrade process. My snapshot that I wanted to revert to was apparently in a bad state. So to avoid these issues take an offline snapshot.

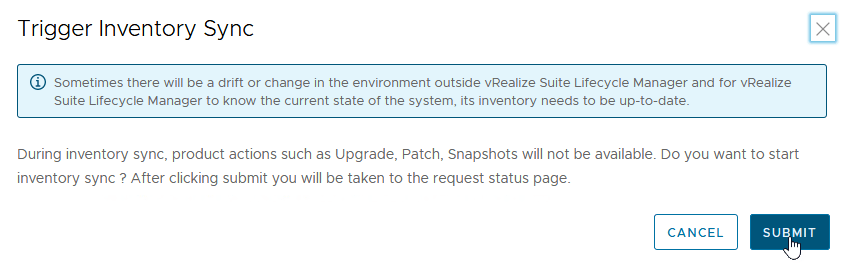
Before you start trigger an Inventory Sync.
Click on Submit to start your sync.
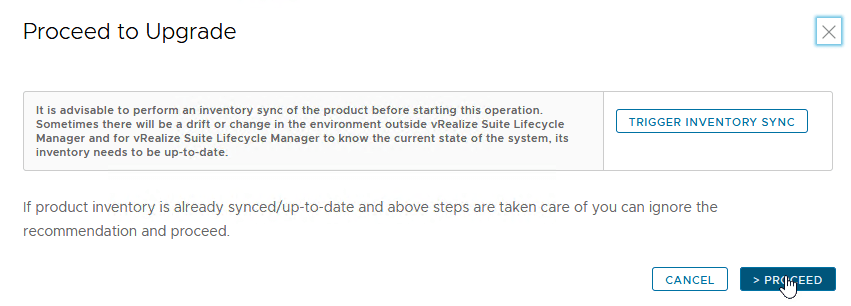
Once the sync is finished go back to your Environments. Go to your VRA8 environment => View Details. And click on upgrade again. Now your ready to proceed your upgrade. Click on “Proceed”
Click on Next. We will use the LCM repository because we created the Binary Mapping in advance.

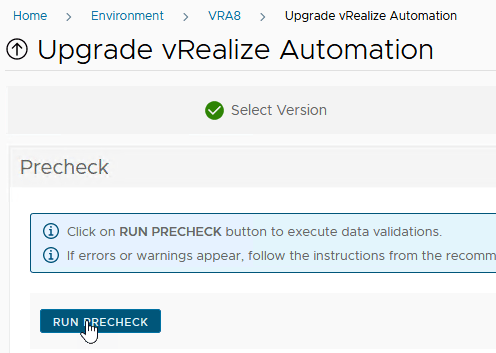
Run the Precheck
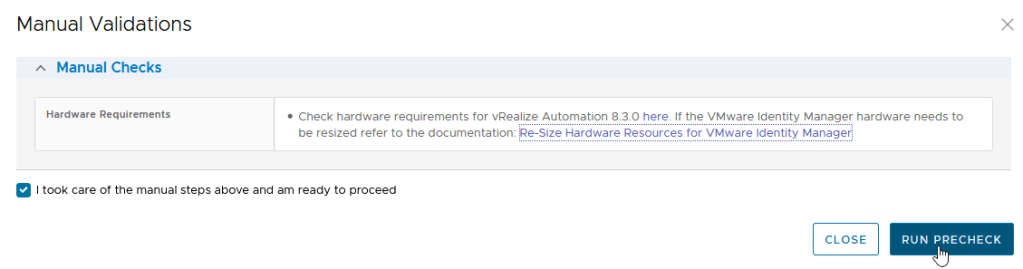
Check the box to say that you took care of the manual steps and then click on “Run Precheck”
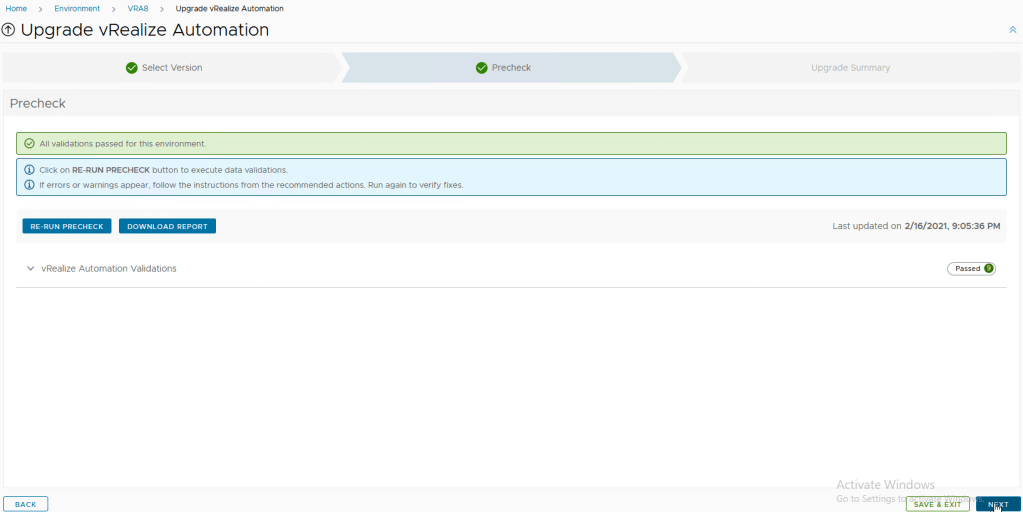
If all is good click on “Next” in the bottom right of the screen.
And now submit your upgrade

Sit back, relax and wait till it’s finished.
5. VIDM offline upgrade
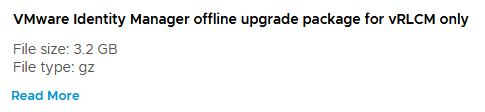
I wasn’t able to download the package through “My VMware” account so I needed to download the offline package for LCM. Once you download it, copy it with winscp or other tools to your LCM appliance. I’ve copied it to /var/tmp.
Go to LifeCycle operations => Settings => Binary Mapping and click on “Add Binaries”
Fill in your Base Location, this is the location where you copied the offline package. In my case it was /var/tmp and then click on discover. Check the upgrade package and click on add.

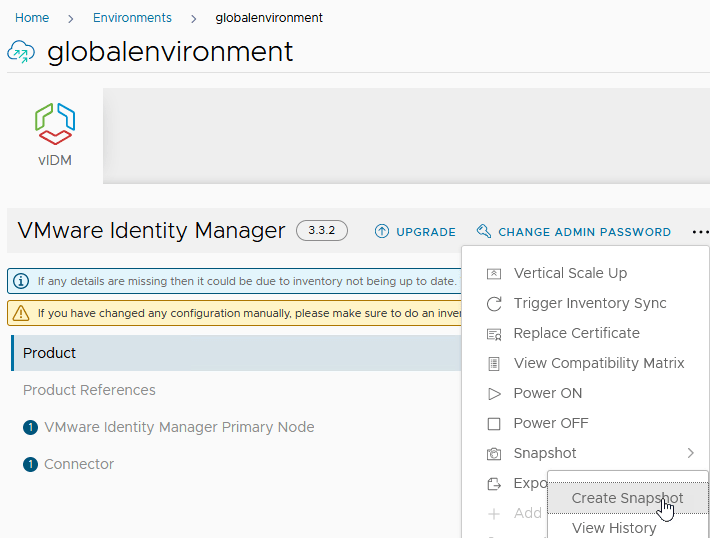
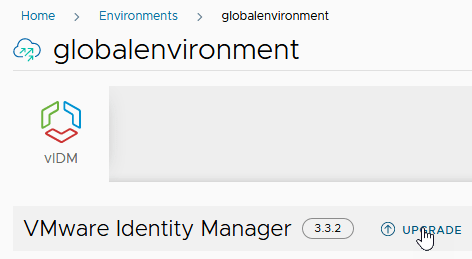
Now we can start upgrading the vIDM appliance. Go to LifeCycle operations => Environments
Take a snapshot of your VIDM appliance, again preferably an offline snapshot.
Give your snapshot a name and click on “Submit”
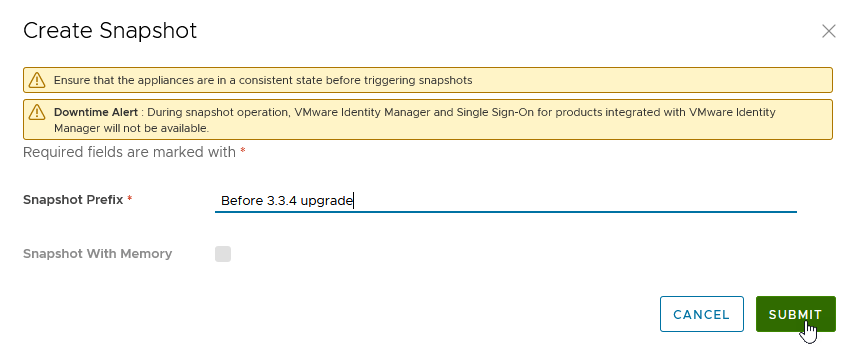
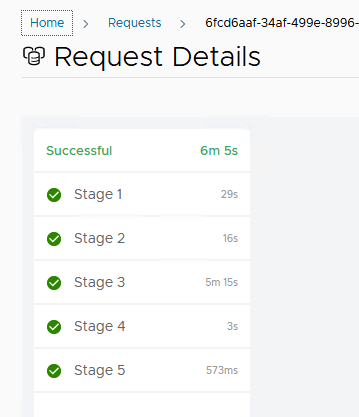
If you check your request of your snapshot, you will see there are 5 stages foreseen in the snapshot process. So this will take a bit of time depending on your environment.
Now go back to LifeCycle operations => Environments. And go in to your VIDM environment. Click on “Upgrade”
Confirm that you took a snapshot and trigger an inventory sync
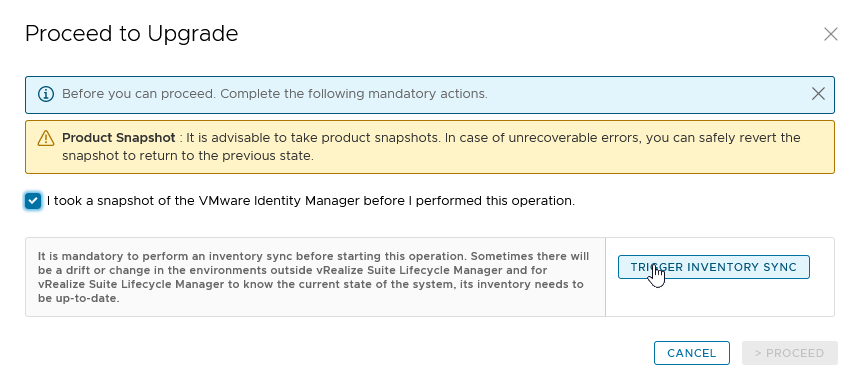
Once that’s done you will be able to proceed with your upgrade.

Click on Next in the lower right corner

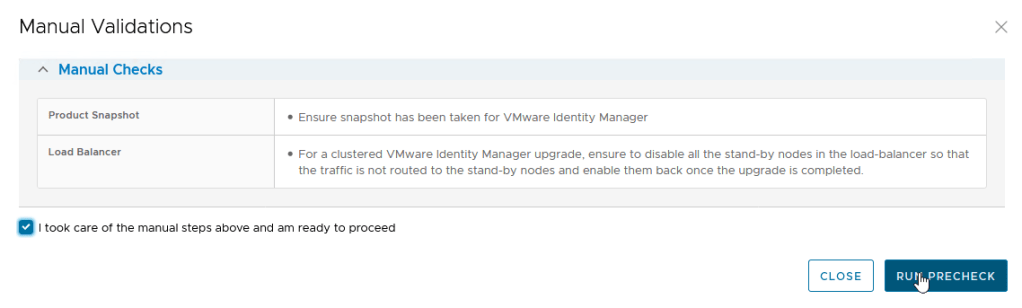
Run a PreCheck

Check that you took care of the manual steps. And click on run precheck.
Once your precheck is done click on “Next” in the lower right corner.

Now click on Submit to start your upgrade.

My initial deployment failed. Here you can see, that it couldn’t check the VIDM version

I’m going to leave the VIDM upgrade troubleshooting for my next post as this article is already quite long. Keep you posted guys 🙂

Hi, did you troubleshoot vidm upgrade error? I have same issue.
LikeLike
Hey Raitis, unfortunately I didn’t have the time yet to solve my issue. I’ll keep you posted if I get this solved.
LikeLike