People that follow me on Twitter, know that we (vExperts) received an awesome gift from Cohesity. During VMware Explore in Barcelona we received a NUC for our homelab. How cool is that, an excellent gift to extend my homelab.
Content blog article
- Extra hardware
- Obtain licenses
- Installing ESXi
- Installing ESXi with custom image
- Make NIC config peristent after reboot
- Closing off
1. Extra hardware
Like with any NUC, you need to buy some extra hardware to be able to use it. This is the RAM and NIC I’ve bought to fit my homelab. You also have to buy a harddrive but I still had something laying around.
| Hardware | Type | Price | Website |
| RAM | 64GB : 2 x Crucial CT32G4SFS624A | 170,80€ | Amazon link |
| NIC | Cable Matters USB to Ethernet Adapter (USB 3.0 to Ethernet) | 16,99€ | Amazon link |
2. Obtain licenses
How can you get licenses to start your own homelab? Well you have 2 options.
The first option, which is free of charge, is to become a vExpert. Joining the vExpert community is one of the best things that ever happened to me. It helped me extend my network, helped me learn a lot of cool things at the UserCons and I also became a VMUG Leader because of the vExpert program. So don’t think twice and apply now 🙂
If you don’t know where to start, reach out to me. As a vExpert PRO, I can help you with your application.
The second option is to purchase a VMUG Advantage membership at https://www.vmug.com/membership/vmug-advantage-membership/ for only 200$. This gives you access to VMware licenses for almost all the products for a year, discount on courses, and a lot more.
Do you want a discount on your Advantage membership? Give me a shout and I’ll give you an extra 10% discount on your membership.
So what are you waiting for? Either option is great to start with your own homelab.
3. Installing ESXi
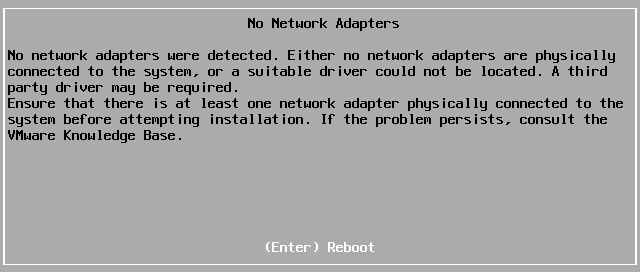
When you install ESXi on the NUC with the standard image it will fail because there aren’t any drivers in the standard image for the onboard NIC’s nor for the USB NIC.
This means we will need to build a custom image to install ESXi on our NUC.
3.1 Download USB fling
If you’re wondering what the hell the USB fling is. Well that’s a community project driven by William Lam that gives the possibility to use USB NIC’s for our homelabs.
I’m going to install vSphere 8, so I need to download the matching USB NIC driver from the Fling website => link
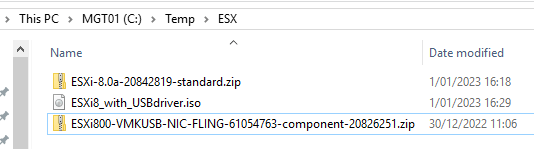
Download the driver and save it to eg. C:\temp\ESX

3.2 Build custom image
Open a powershell in Administrator mode and navigate to the same directory as where we downloaded our USB NIC driver. In my case C:\temp\ESX
First we’re going to add the software depot from the VMware website.Add-EsxSoftwareDepot https://hostupdate.vmware.com/software/VUM/PRODUCTION/main/vmw-depot-index.xml

Now that we added the depot, we can search for the ESXi Image that we need. Remember, I’m installing vSphere 8 so I’m searching for anything with ESXi-8 in it’s name.Get-EsxImageProfile -name ESXi-8*

3.2.1 Issue 1: Update PowerCLI
Now we need to download the vSphere 8 image locally.Export-EsxImageProfile -ImageProfile ESXi-8.0a-20842819-standard -ExportToBundle -filepath ESXi-8.0a-20842819-standard.zip

I was getting these type of errors while creating my new image => “File path of ……. is claimed by multiple non-overlay VIBs”

Reason for that was because I was still running an older version of powerCLI. Meaning it was time to update my modules 🙂 Update-Module VMware.*

3.2.2 Issue 2: Install Python
Next issue that was waiting for me, was the fact that Python wasn’t installed. This is a prereq. for the latest version of PowerCLI if you want to use ImageBuilder.

The prereqs for Python are documented on the VMware developer website => link
But I noted them down below:
- Download python from www.python.org/downloads/release/python-379/ and install it. No printscreens of that because it’s a simple next, next, finish.
- It has to be 3.7 because I’ve tried with the latest version (3.11) and it didn’t work 🙂
- Download get-pip.py from https://bootstrap.pypa.io/get-pip.py and install it with
.\Appdata\Local\Programs\Python\Python37\python.exe C:\Users\administrator.VKASAERT\Downloads\get-pip.py

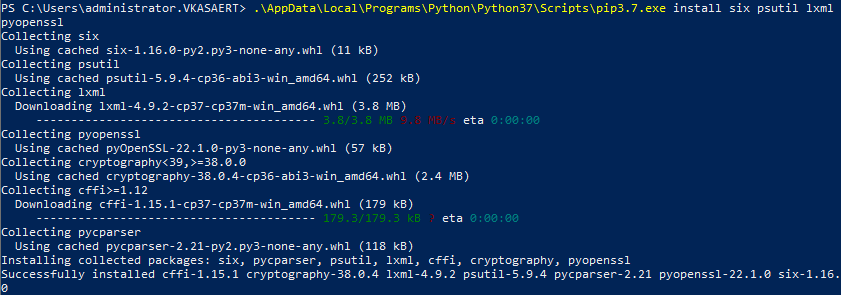
Install the required extra packages .\Appdata\Local\Programs\Python\Python37\Scripts\pip3.7.exe install six psutil lxml pyopenssl
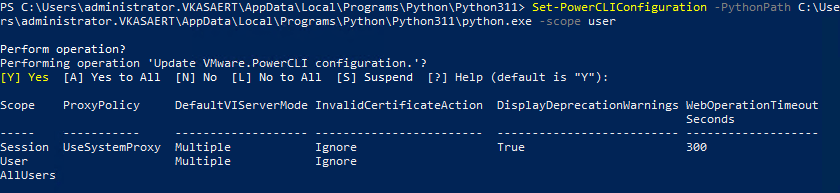
After the installation, we need to set the python path in PowerCLI. You will see that the printsreen still references my attempt of installing Python 3.11 but the command below is the correct one. Sorry about that.Set-PowerCLIConfiguration -PythonPath C:\Users\administrator.VKASAERT\Appdata\Local\Programs\Python\Python37\python.exe -scope user
After you set your powerCLIConfiguration, you must reboot your machine for the configuration to work.
You can always check your config with Get-PowerCLIConfiguration | select *
After your reboot you should be able to run python from your powershell.

3.3 Continue building custom image
Now that I tackled all the issues I can finally download the vSphere 8 Image.Export-EsxImageProfile -ImageProfile ESXi-8.0a-20842819-standard -ExportToBundle -filepath ESXi-8.0a-20842819-standard.zip
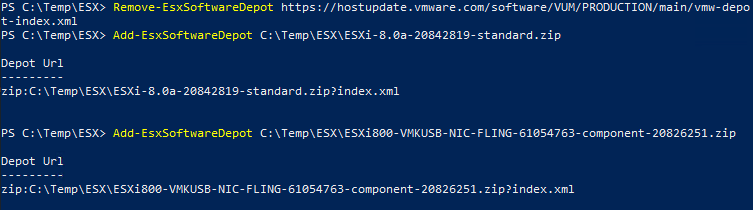
Once the image is downloaded we remove the SoftwareDepot and we add both files in our SoftwareDepotRemove-EsxSoftwareDepot https://hostupdate.vmware.com/software/VUM/PRODUCTION/main/vmw-depot-index.xmlAdd-EsxSoftwareDepot C:\Temp\ESX\ESXi-8.0a-20842819-standard.zipAdd-EsxSoftwareDepot C:\Temp\ESX\ESXi800-VMKUSB-NIC-FLING-61054763-component-20826251.zip
With this command we’re creating our new ImageProfileNew-EsxImageProfile -cloneprofile ESXi-8.0a-20842819-standard -Name "ESXi8_with_USBdriver" -Vendor vKasaert

In this step we’re adding the USB driver to the ImageProfile we created in the previous step.Add-EsxSoftwarePackage -ImageProfile ESXi8_with_USBdriver -SoftwarePackage vmkusb-nic-fling
If you want to know where I got the “vmkusb-nic-fling” just execute Get-EsxSoftwarePackage and search for the USB fling package.

Now we will export the image to an ISO file.Export-EsxImageProfile -ImageProfile ESXi8_with_USBdriver -ExportToIso -FilePath ESXi8_with_USBdriver.iso
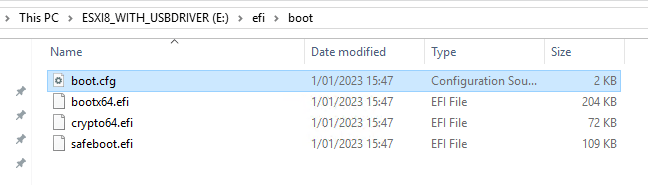
If you open your explorer, you will see the ISO that we just exported.
You can create a bootable image with Rufus
4. Installing ESXi with custom image
If you know my kind of luck, you will know that my issues aren’t done yet. Installing ESXi with the custom image started, but at 73% I got an error message “no vmknic tagged for management”.
This is because we’re using a USB NIC.
What do you need to do…
- Remove your USB drive
- Reboot
- Logon with empty password
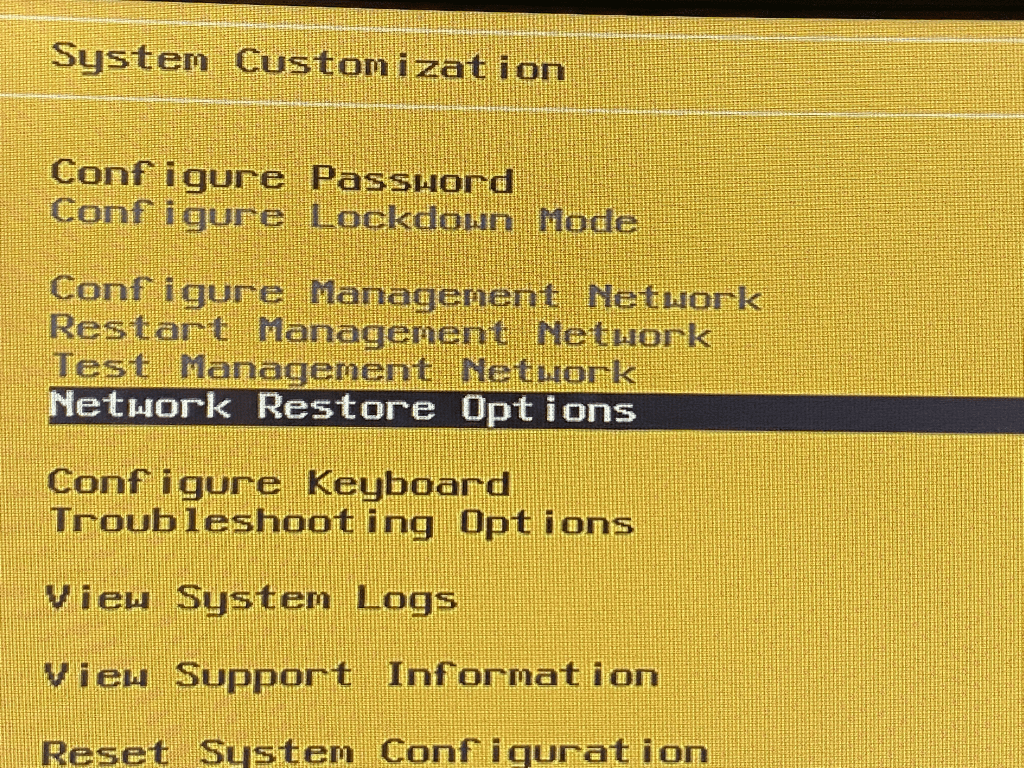
- Go to “Network Restore Options”
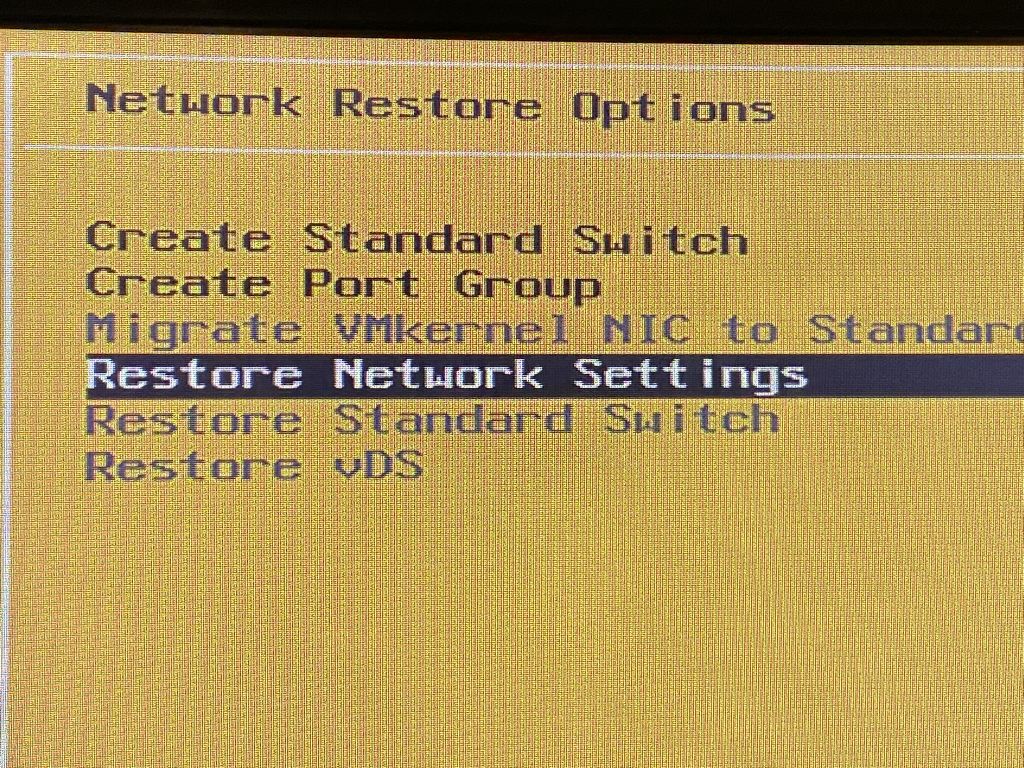
Choose “Restore Network Settings”
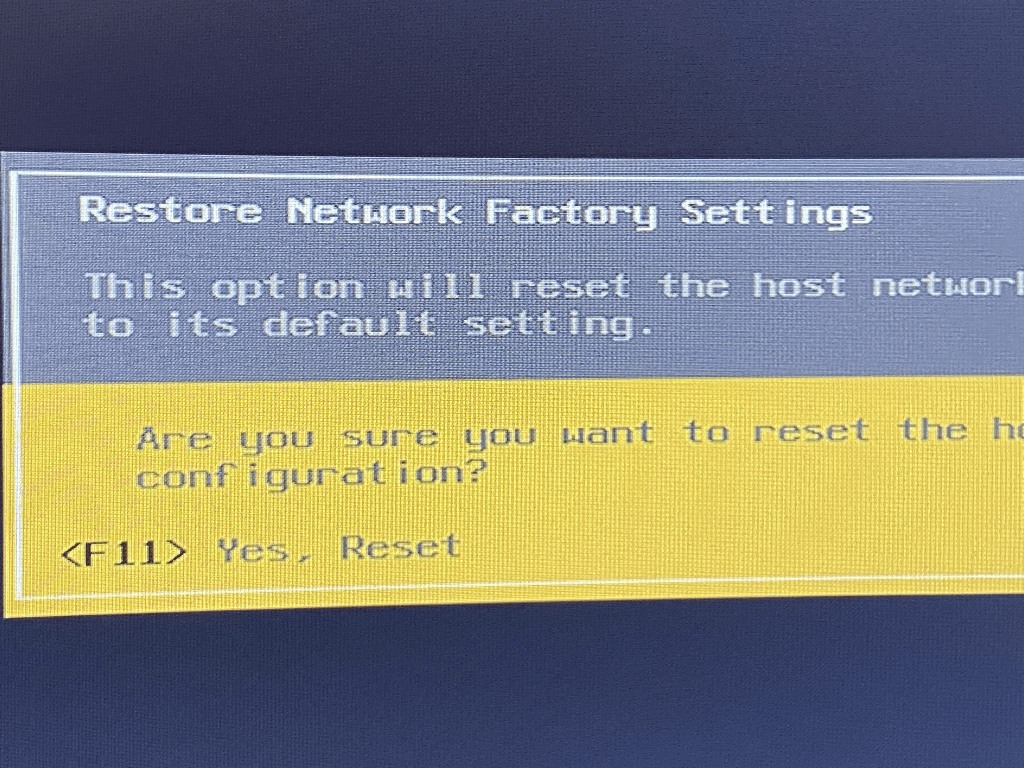
Press F11 to Reset.
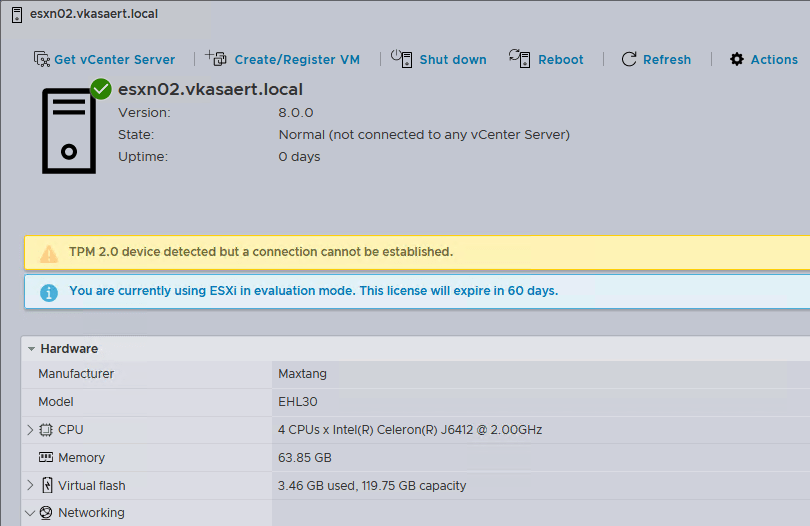
After this step you should be able to configure the network settings on your NUC and you’re able to access your fresh ESXi install 🙂
4.1 Avoiding the install failure
Alternatively, if you want to avoid this failure at 73% you can edit the boot.cfg config on the bootable USB drive that you created. Go to /efi/boot/ and edit the boot.cfg file.
On line 6 that contains “kernelopt” append “usbBusFullScanOnBootEnabled=1” at the end.
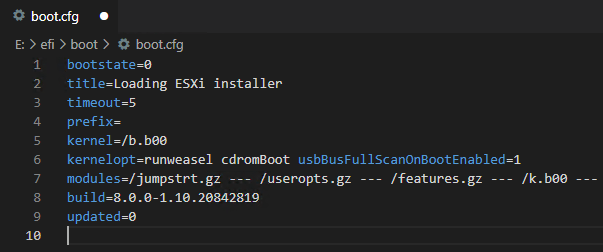
This will install your ESXi without the install failure.
5. Make NIC config peristent after reboot
To make sure the USB NIC remains persistent after reboot you need to edit the /etc/rc.local.d/local.sh file. Add below text to the file and save it.
vusb0_status=$(esxcli network nic get -n vusb0 | grep 'Link Status' | awk '{print $NF}')
count=0
while [[ $count -lt 20 && "${vusb0_status}" != "Up" ]]
do
    sleep 10
    count=$(( $count + 1 ))
    vusb0_status=$(esxcli network nic get -n vusb0 | grep 'Link Status' | awk '{print $NF}')
done

esxcfg-vswitch -R

If you reboot your NUC you will now retain your connectivity.
6. Closing off
Once again a big thank you to Cohesity for the gift.
And hopefully this blog helps you in your NUC ESXi install 🙂
Feel free to leave a comment.
