After we did the deployment through LCM in part 1 (link) and we checked our deployment in part 2 (link) it’s now time to actually start the configuration of our vRealize environment.
Content blog article
- Configuration
- Create tenants
- Create vSphere endpoints
- Create Active Directory Link
- Update Identity provider
- Create Fabric groups
Configuration
1. Create tenants
Login with the administrator account to the default tenant => https://fqdn_vra/vcac. Go to Tenants and click on New.

Fill in the required fields.
Name: Display name of your tenant.
URL name: This will be used to create your URL to the tenant. In my case the url will be => https://fqdn_vra/vcac/org/vkasaert-test (URL name).
When you’re done click on “Submit and Next”.

Here you can create a local admin account for your Tenant. Click on New.

Fill in the required fields for your userid you want to create. Click on Next when you’re ready.

Because we don’t have AD integration yet, we cannot add AD groups for the Tenant & IaaS administrators. But make sure that you add the previously created userid in both groups. Then that userid will be your Tenant & IaaS administrator. Click on Finish when ready.

Now you can test if you can connect with your userids to your tenant.
2. Create vSphere endpoints
Login with configurationadmin to the default tenant (https://fqdn_vra/vcac/) and add all your vCenters.
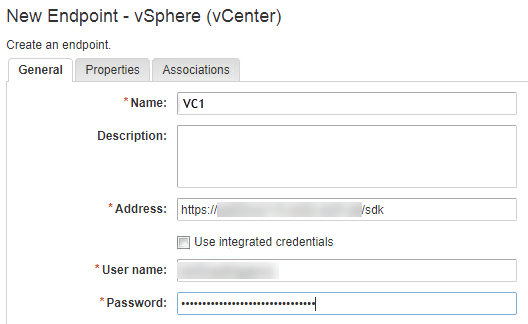
Go to Infrastructure => Endpoints => Endpoints, click on “New” and then choose Virtual => vSphere (vCenter).

In name you need to fill in the exact name as we configured in Part 1 of my vRA deployment in section 6.13. It should match the agent name you configured in the advanced settings (in my case one of them was VC1). Click on ok when done.
3. Create Active Directory link
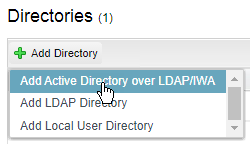
Still logged in with your configurationadmin userid go to Administration => Directories Management => Directories. Click on “Add Directory” and choose “Add Active Directory of LDAP/IWA”
Fill in the required fields for the AD you want to add. When you filled in all the details click on “Save & Next”.
Here you need to make sure that you have 2 service accounts.
1. One with domain admin access, because when you have issues with your AD config you will need that exact same userid. So in case that user has already left the company you’re in trouble.
2. And then a general user account for the binding don’t forget you need to put it UPN format (user@domain)

3. Update Identity provider
With the configurationadmin userid logged in go to Administration => Directories Management => Identity Providers
Click on the WorkspaceIDP where you see your AD in the Directory listed.

Initially you will only see 1 of your 3 appliances listed in your Connectors list. Choose one of your other appliances in the “Add a Connector” dropdown list.

Fill in your credentials of the service account that you’ve used for binding your AD.
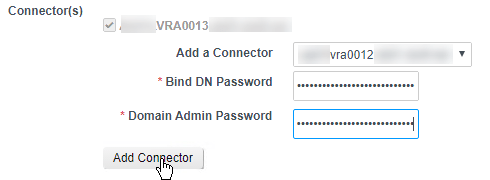
Repeat these 2 steps for your other appliances. But be sure to save your steps in between.
Finally update your IdP hostname to match your loadbalanced name.

4. Create fabric groups
With the configurationadmin userid logged in go to Infrastructure => Endpoints => Fabric Groups
Give your Fabric Group a name, search for your fabric administrators AD group and select the cluster that’s linked to this Fabric Group.

