In Part 2 we’re continuing our configuration.
Content blog article
- Configuration
- Active Directory policies
- Create Active Directory endpoint
- Create Active Directory policy
- Creating reservations
- Create a Business Group
- Create a reservation policy
- Create a network profile
- Create a Reservation
- Configure cross-site deployments
- Configure your web servers
- Configure your compute resources
- Active Directory policies
Configuration
1. Active Directory policies
This is a 2-step process. First you will need to create your AD endpoint and only then you can create your AD policy.
1. Create Active Directory endpoint
Connect to the tenant where you want to configure your AD endpoint.
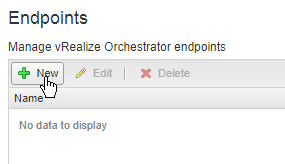
Go to Administration => vRO Configuration => Endpoints and click on New
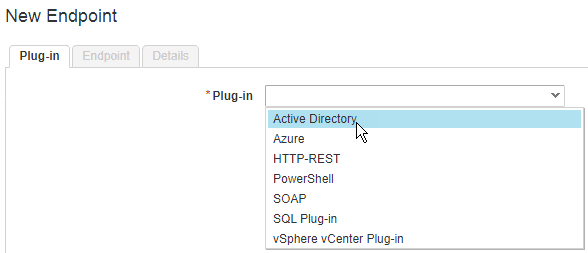
For Plug-In choose “Active Directory”
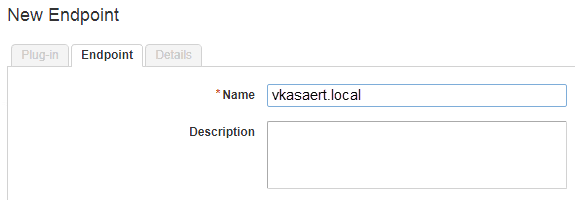
Here just give your AD a name
Now configure your AD connection
1. IP address of your LDAP
2. If you don’t use SSL for AD then keep the default port
3. Base DN of your AD domain
4. Default Domain
5. Service account for your AD config

This can be left as default

2. Create Active Directory policy
Now that we’ve configured our endpoint we can create our AD policy.
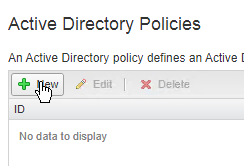
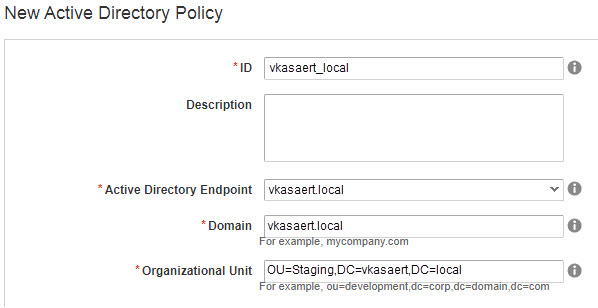
Go to Administration => Active Directory policies and click on New
Configure your AD policy
1. Give it an ID (Here I used underscores to avoid issues with the same name as the endpoint)
2. Choose your endpoint from the drop-down list
3. Fill in your domain
4. And fill in an Organizational Unit in your AD that can be used for staging.
2. Creating Reservations
To be able to create reservations, you have to take 4 steps before this is done. You can find the different steps below.
1.Create a business group
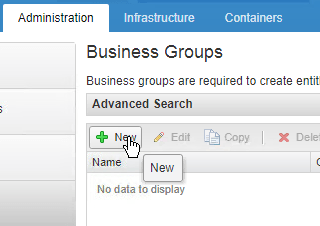
Login to your tenant and go to Administration => Users & Groups => Business Groups.
Click on New
Give your Business Group a name and fill in an email address for the capacity alerts. In my case they aren’t forwarded because I don’t have a mail server yet.

In our setup we only needed a Business Group to make our reservations so that’s why only a Group Manager role was filled in.
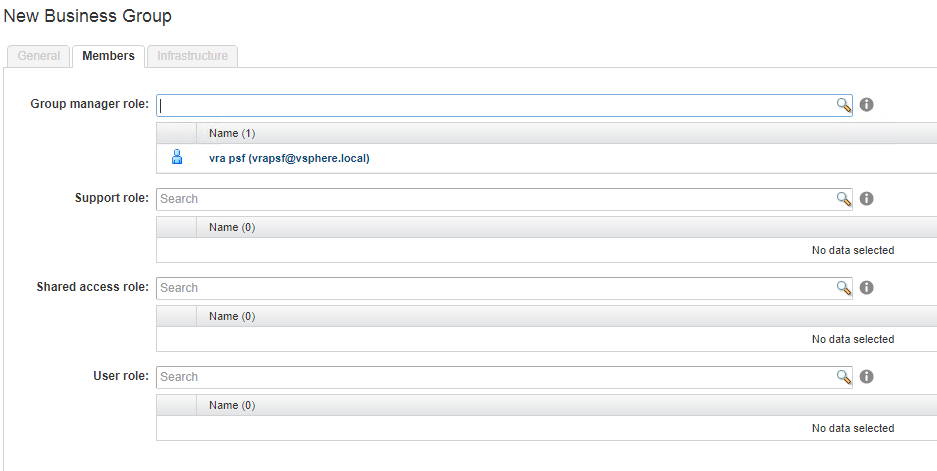
For this part we didn’t use any of these settings so they were left blank.
2. Create a reservation policy
Go to Infrastructure => Reservations => Reservation Policies and click on New

We created reservation policies based on available storage and on the blueprints we created.

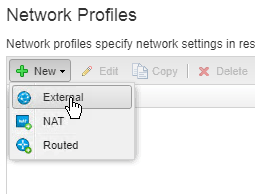
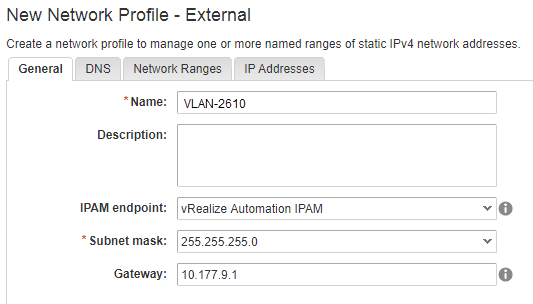
3. Create a network profile
To create Network profiles go to Infrastructure => Reservations => Network Profiles. Click on New and choose your type of network.
Give your VLAN a name and fill in your subnet mask and gateway. As you can see I used the internal IPAM solution of vRA. But take care, and check if this internal IPAM suits your needs. This built-in version doesn’t foresee any monitoring or alerting on your VLAN’s.
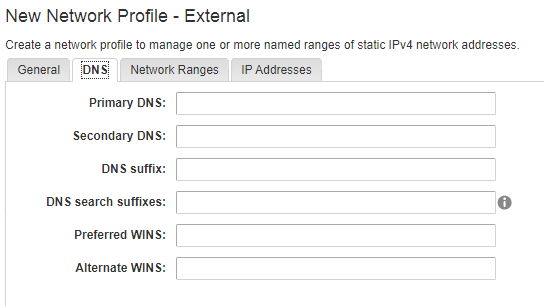
Fill in your DNS settings to match your environment
In the tab “Network Ranges” click on New
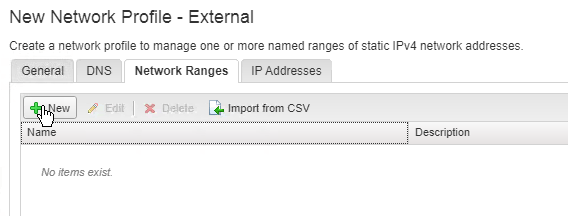
Give your range a name and fill in the range that you can use for your deployments. Click on ok to close your window.

4. Create a reservation
Now we’re finally able to create a reservation. Go to Infrastructure => Reservations => Reservations. Click on “New” and choose where you want to create your reservation. In our case it’s on vSphere.

Give your reservation a name and for the rest of the required fields choose the correct ones from the drop-down list.
Give the reservation a priority and enable it.

In the “Resources” tab choose the correct “Compute resource”. Determine how much Memory & Storage this reservation can use.

Don’t forget the choose the correct resource pool at the bottom of the screen if necessary.

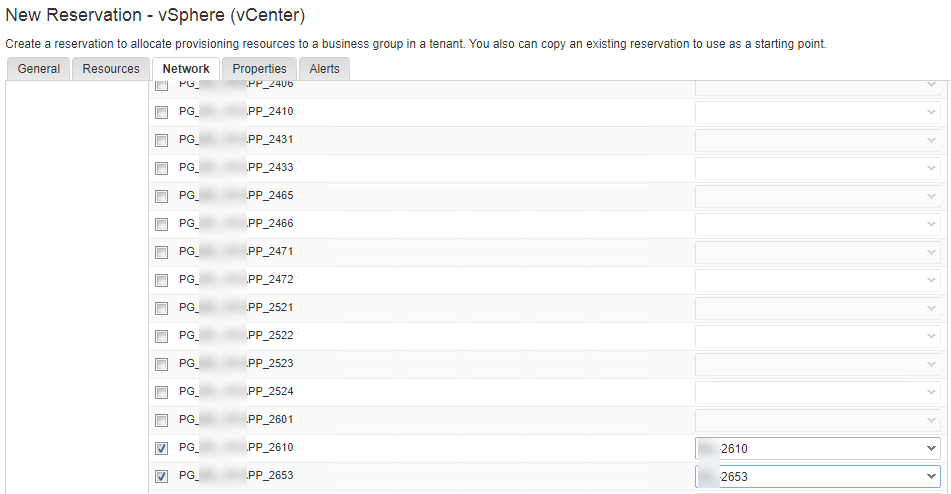
Choose the correct Portgroups and the matching network profiles that were created.
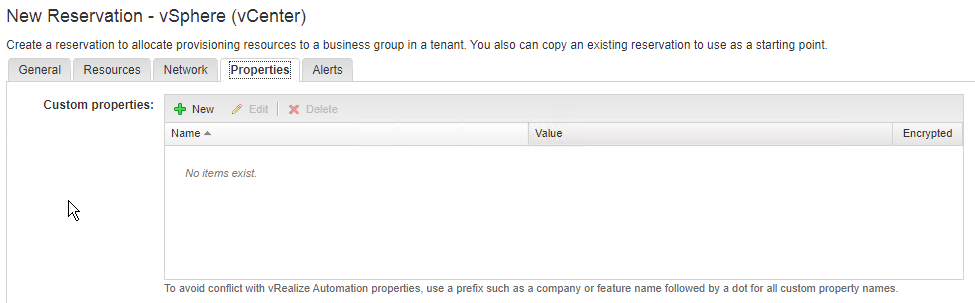
In our case we didn’t use custom properties in our reservation.
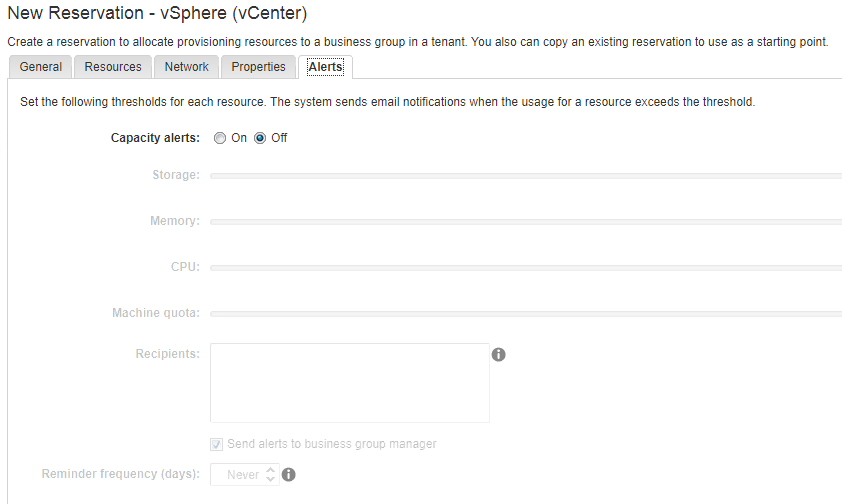
And no capacity alerts were configured either.
3. Configure cross site deployments
1. Configure your web servers
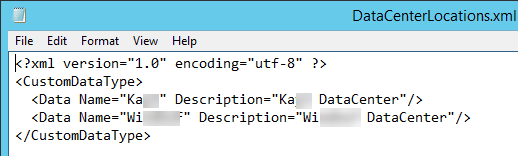
Connect to your IaaS servers (web servers) and go to c:\Program Files (x86)\VMware\vCAC\Server\Website\XmlData. Edit the file to add your different sites. Save and close the file when finished editing.
Restart the manager service. If you have more than one IaaS Web Server host, repeat this procedure on each redundant instance.
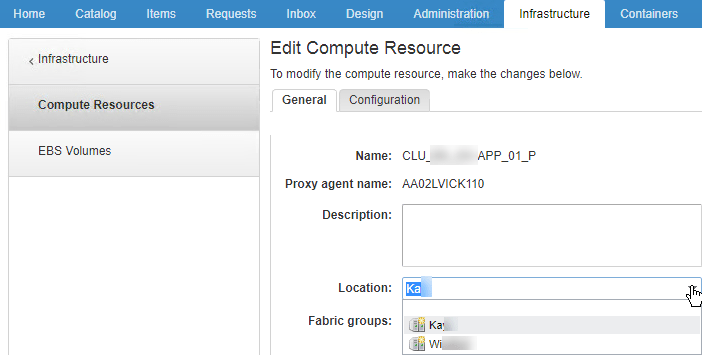
2. Configure your compute resources
Go to infrastructure => Compute Resources.
Select the correct Location from the drop-down box to match your compute resource.
Closing off
This concludes part 2 of the vRA configuration. In the next blog I’ll finalize the configuration and I’ll also share some encountered issues on my project.
