This will be a post for dummies on API’s. No offense to anyone, because I’m referring to myself in this case 🙂 . Before I started with this post I never really had the need to work with API’s and I didn’t know much about them. So with this post, I want to document everything I encounter. As such I have a reference for myself in the future. And hopefully, I can help some others during the process.
When you’re starting with API calls on Aria, there are two places where you can find more info. Well actually three now I start to think of it:
- Connect to your local deployment “https://vra_fqdn/automation-ui/api-docs/” where you will find information about API calls organized by use category.
- Or you can check the online API documentation (currently version 8.6) => here
- And off course google is your friend.
In this first part, I’ll cover some general configuration steps of your automation deployment. In the second part I’ll cover the rest of the configuration and also some more advanced API calls and bulk POSTs.
Content blog article
- Generate a refresh token
- Generate a bearer token
- Create a cloud account
- Create a cloud zone
- Create a project
1. Generate a refresh token
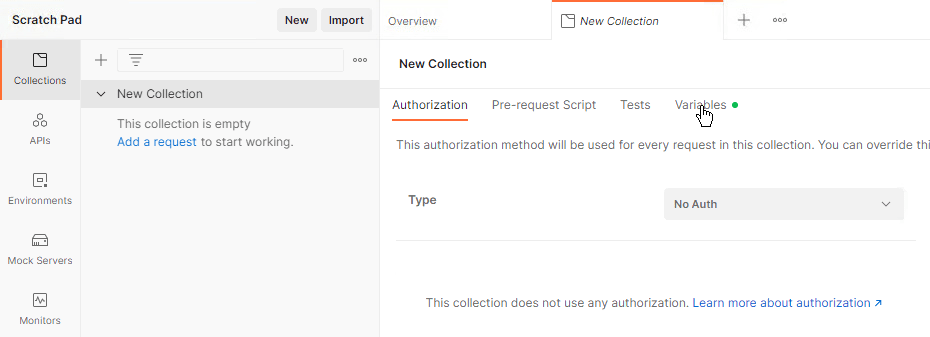
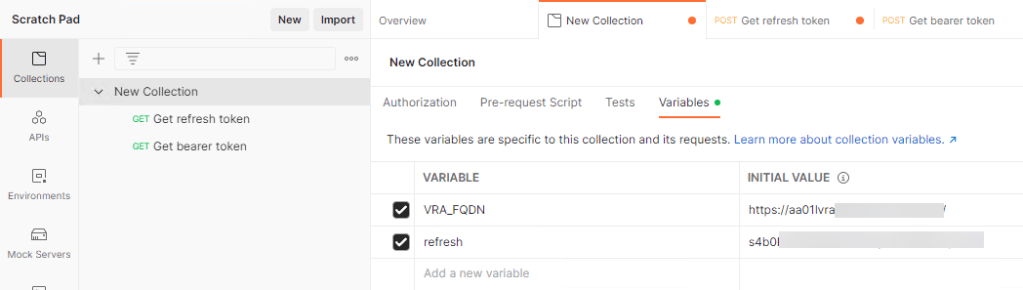
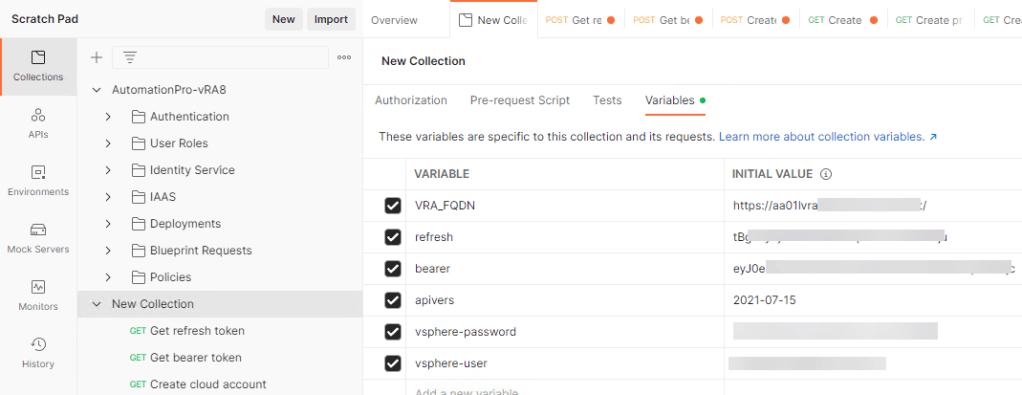
Getting a bearer token is now a 2-way process. Before you can get one, we first need a refresh token. But before we get a token, let us first create some variables. On your collection go to “Variables”
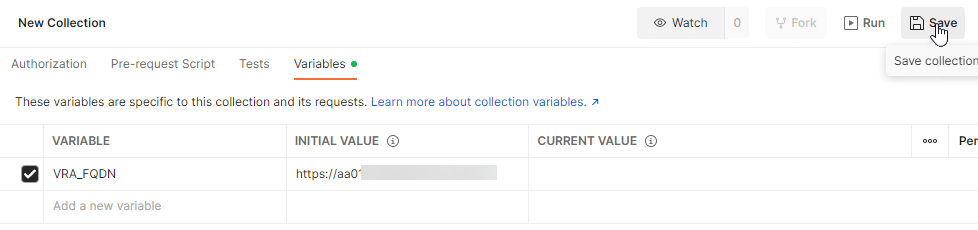
We will add a variable “VRA_FQDN” that contains a link to your instance. In my case I added the trailing “/” so “https://vra_fqdn/” and DO NOT forget to save your variable. If you forget you will not see you your variable or you will not be using the updated version of your variable.
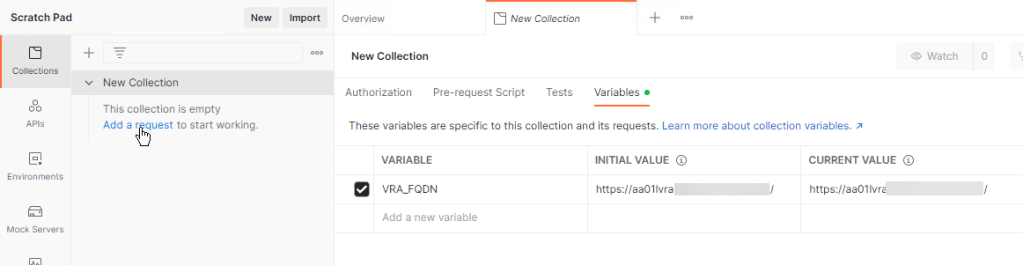
Now that we created our variable, click on “Add a Request”
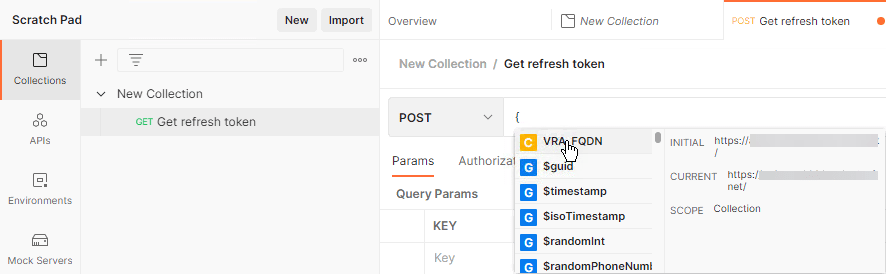
Next to the “POST” start typing a first “{” Then you will see a list of all your available variables. Click on “VRA_FQDN” to add it.
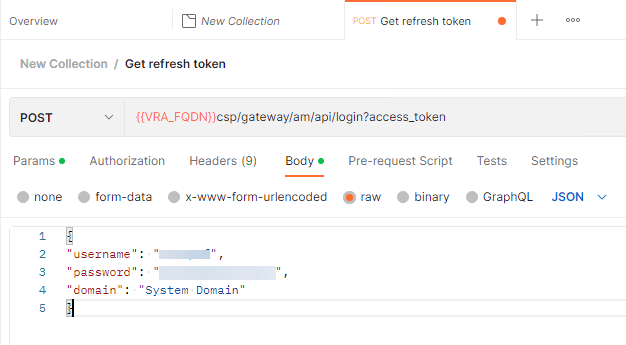
Now go to the “Body” section and select raw. Make sure that you change your content from “TXT to “JSON” (the blue text on the right).
The POST command is sent to “csp/gateway/am/api/login?access_token”{
"username": "default_configuration_admin",
"password": "default_configuration_admin_password",
"domain": "System Domain"
}
After you send the POST command you will find in the bottom section your refresh token.
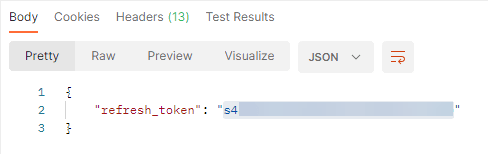
Copy the token and add it into a variable. Again DO NOT forget to save your variables.
2. Generate a bearer token
With the second step of the process we will get our bearer token we need for doing some actual API work. To generate the bearer token we will execute a POST command to “iaas/api/login”.
You will see that in the body I’m using the refresh variable that I just created.{
"refreshToken": "{{refresh}}"
}
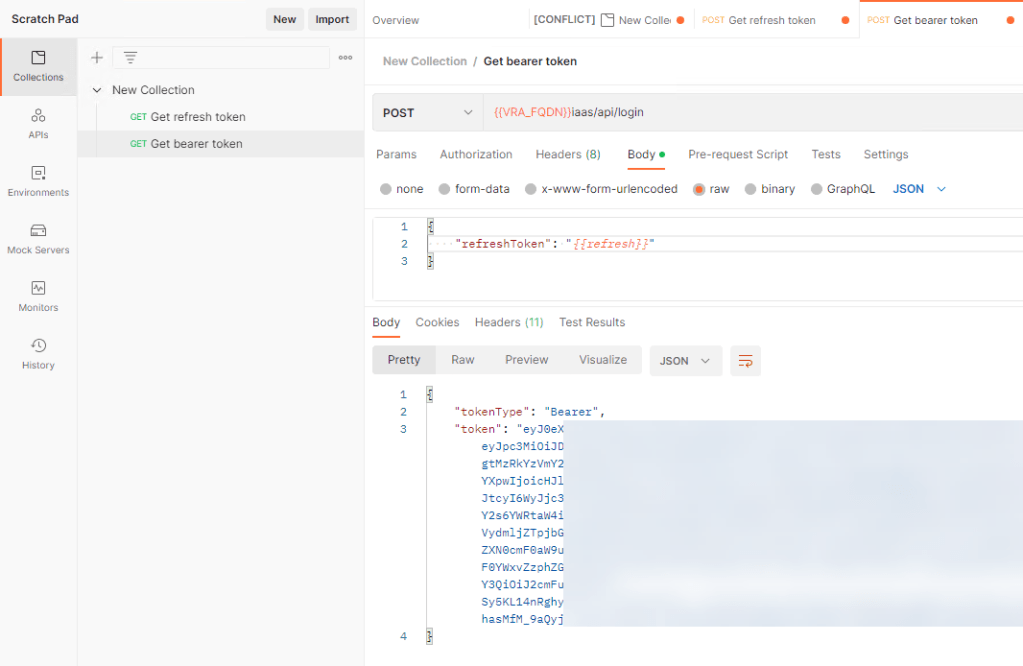
By now you should know where you can put the bearer code into a variable 🙂 . And we’re going to set the bearer code as the default authorization on the collection. In that way all API requests will be executed with that bearer token. So we no longer have to think about that.

3. Create a cloud account
Before I’m going to create a cloud account I’ll also add my vsphere userid & password to my list of variables.
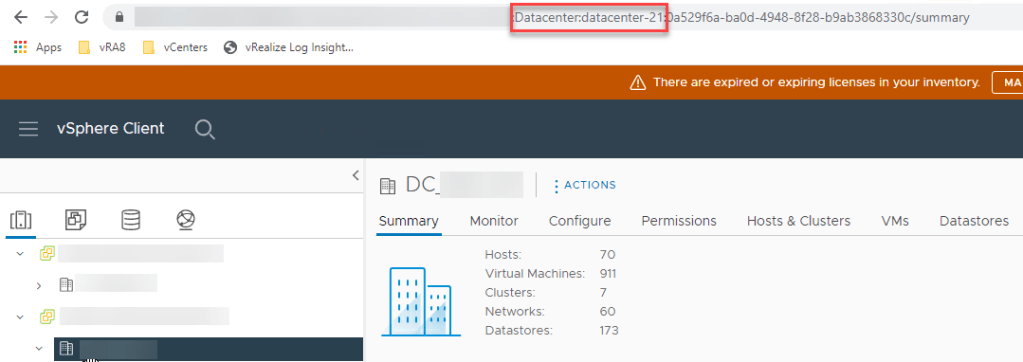
But before we can create our cloud account, we need to find our “Datacenter” name. Connect to the vCenter you want to add and then click on the Datacenter you want to add. In your HTTP bar write down the name of your Datacenter.
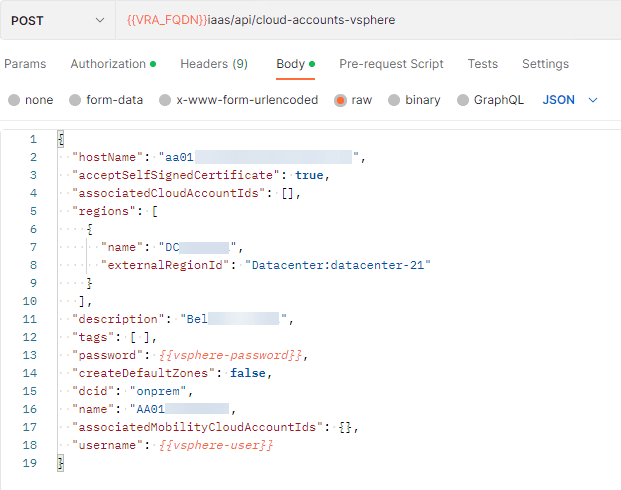
To create a cloud accounts we’ll do a POST command to “iaas/api/cloud-accounts-vsphere” with below body.
{vCenter_fqdn
"hostName": "",shortname
"acceptSelfSignedCertificate": false,
"regions": [
{
"name": "name_of_your_DataCenter_in_vSphere (in my case it started with DC_)",
"externalRegionId": "Datacenter:datacenter-21"
}
],
"description": "Give it your description",
"tags": [],
"password": {{vsphere-password}},
"createDefaultZones": false,
"dcid": "onprem",
"name": "vCenter_",
"username": {{vsphere-user}}
}
Once you click on “Send” you should always check to see if your request was created. A status of “201 Created” means he successfully created your cloud account.

4. Create a cloud zone
Before we start creating our cloud zones, we’re going to do a GET command of the cloud accounts. Because I noticed some issues when I created my cloud zones to fast after the cloud account creation. So please make sure that you see these custom properties before you continue. Otherwise there initial sync phase didn’t complete yet.
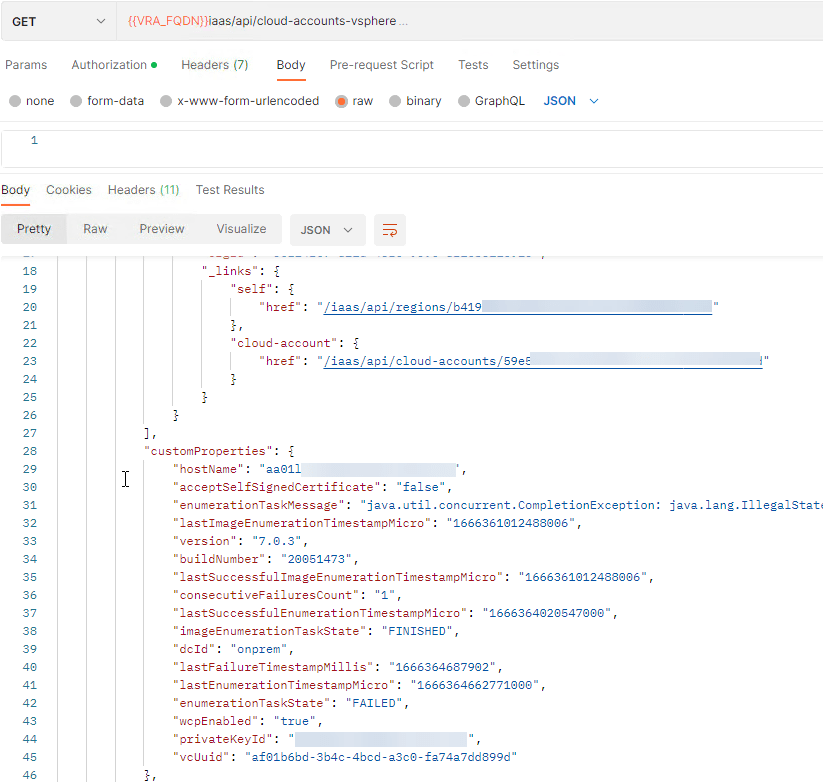
Now that the initial sync completed we can continue with the creation of our Cloud Zones. But again we need to get some information from the GET command of the cloud accounts. We need the “id” for the cloud account we created.

To create your Cloud Zone copy your id from the previous step into the “regionId”. And do a POST to “iaas/api/zones”
{
"regionId": "id_of_your_cloud_account",
"name": "your_cloud_zone_name",
"description": "Your_description",
"placementPolicy": "DEFAULT"
}
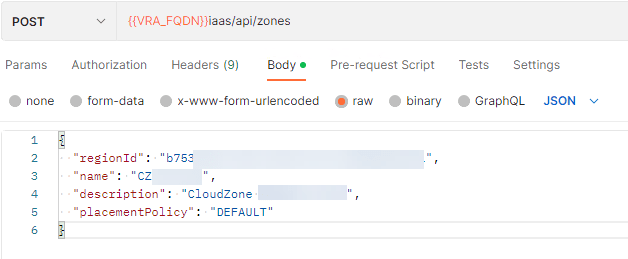
Once again check if your request was successfully created.
5. Create a project
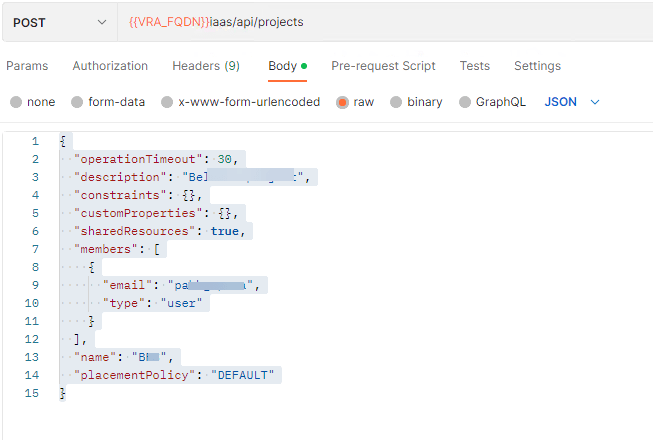
Creating a project is easy. Just do a POST to “iaas/api/projects”. I added a domain user in the member list of my project.
{
"operationTimeout": 30,
"description": "Your_description",
"constraints": {},
"customProperties": {},
"sharedResources": true,
"members": [
{
"email": "userid",
"type": "user"
}
],
"name": "your_name",
"placementPolicy": "DEFAULT"
}
Closing notes
Just as I mentioned in the start of the article, make sure you stay tuned for part 2. There I’ll continue the configuration of Aria through API’s and I’ll also do some more advanced options with Postman. See you later.
And feel free to comment on this post.
